
Pay attention to the official account, reply " python data " in the background, and get the python data package.
Hello everyone, welcome to the Python introductory tutorial produced by Idea Lab. I am the head of the room.
On our way to learn programming, the one that accompanies us the longest is the interpreter. And we often use the print function to let the interpreter print out some information to see how the program is running, and the information about the abnormal operation of the program will also be printed out. If the program is written without a graphical interface, the information printed by the interpreter may be the key prompt to guide people to operate the program. So an expressive print result can not only make us pleasing to the eye, but also bring a better experience to the user.
But what we print out right now is so ordinary and unremarkable. How can we make what the interpreter prints out in front of our eyes? We can use the rich module.
The rich module is so lavish when you hear the name. However, the rich here does not mean rich, it represents "rich text". Some students may ask, are there rich and poor texts? Yes! What we write in the notepad and what we print out using the print method can be regarded as "poor text". There is nothing but text, no font, no font size, no color, no size. But because the word "poor" doesn't sound good, we can change it and call it "plain text".

But "rich text" has a wide and small aura as soon as it comes out, it can set various elements such as font, font size, color and so on. This increases the expressiveness of the text by several notches. So how to edit rich text? Students who have read the room director's HTML tutorial can quickly think of it: use tags. The director will talk about how to use the markers in the rich module later.
Of course, the rich module is more "rich" than rich text. It can also automatically highlight syntax, print tables, print markdown text and implement some other functions, which is very practical. Without further ado, let's install the rich module and try it out for ourselves. The installation name of the rich module is the same as the import name. Before importing, we can use python to run the rich module in the terminal (modules can also be run as code):
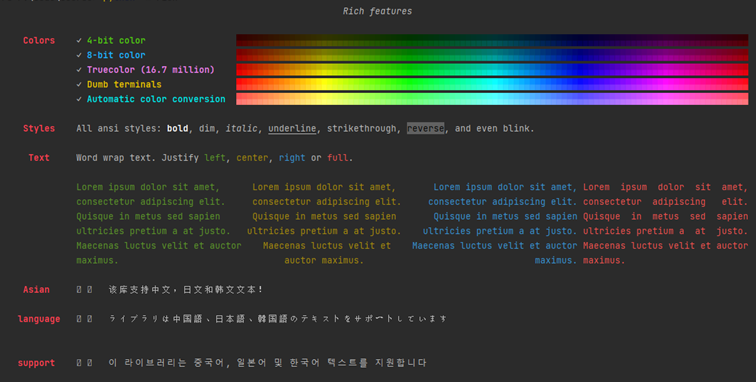
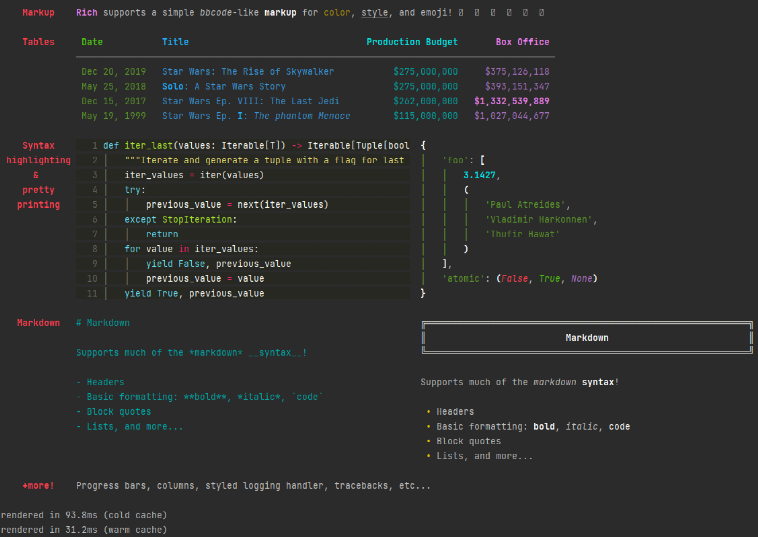

Does it look dazzling?
We need to import the print method in the rich module. This method has the same name as the system print method. If these two methods are used in the code, the name needs to be changed when importing. Let's print a list to see how the two methods differ:


It's no different! If you are using PyCharm, you will indeed get this result, but this is because the command line interface that PyCharm uses to run the code to run the code comes out by default is "no color mode", we need to set it. Click this little wrench:
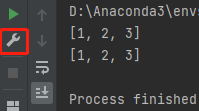
Then check Emulate terminal in output console under Execution.

Now let's do it again:

Is it different?
Although we didn't specify the font color to print out, the rich module did so automatically based on the data type. Let's take a look at what other data types will look like:


Even bool values and data types have their own exclusive colors, and now I finally don't have to look at a bunch of white text and have a headache.
Next is the markup method of rich text that we talked about earlier. Unlike HTML, the rich module is marked with square brackets:


But the rich module is marked in a more arbitrary way, and can accommodate multiple styles in one markup:


In addition, the rich module can also easily print emoji expressions, but this requires the support of PyCharm or command prompt. The head of the room has not tested successfully on win10. Students who know it can leave a message to share. The method of printing is very simple, just add two colons on both sides of the emoji expression name:

More advanced, if our string to be printed is a piece of code, the rich module can also implement syntax highlighting:
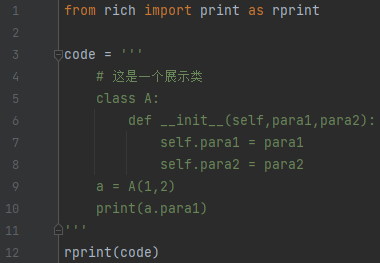
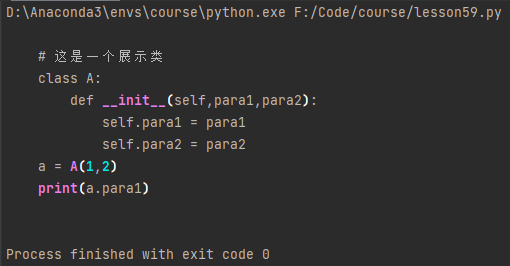
But it doesn't look very good, that's because we didn't tell the rich module what language the code is. In the rich submodule syntax, there is a Syntax class. We pass the code into the Syntax class and set the code language and display style to make code highlighting that conforms to the language:
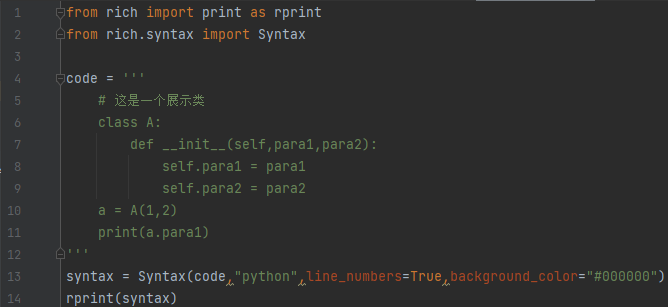
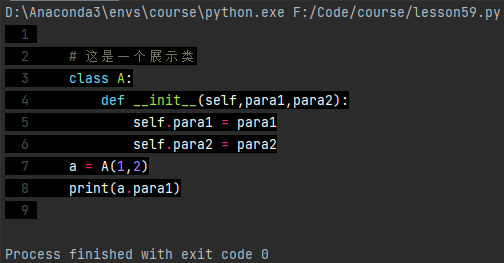
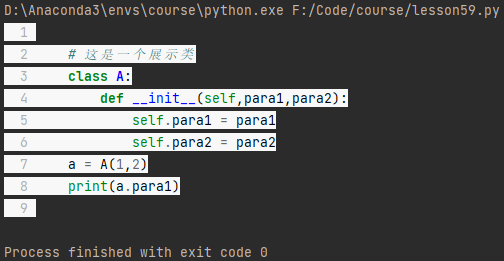
这里室长设置了两个格式,一个是显示代码行数,一个是背景颜色为黑色。如果想改文字的配色规则的话需要设置theme参数,内容是各种配色的名称,比如我们现在PyCharm使用的darcula:

如果你觉得Python的异常提示信息总让你摸不到头脑,还要按照行数一行一行地去比对出问题的地方,甚至不知道出问题时变量的值是多少,那你不妨尝试一下rich的traceback功能。最简单的方法就是直接把traceback安装到代码中,这样代码出现的异常都会出现rich的traceback信息:
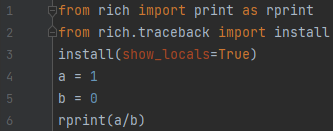
这里我们设置了show_locals参数为True,这样就可以显示异常发生时各个变量的值了:
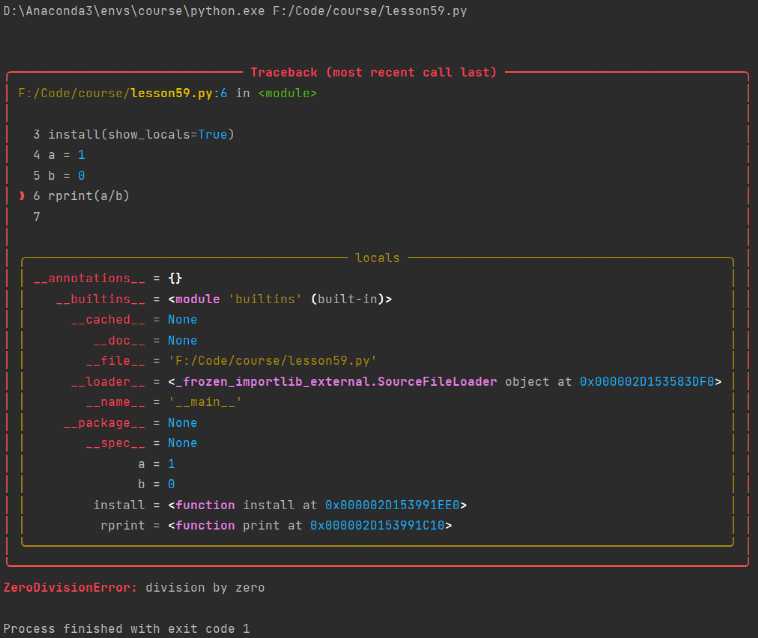
可以看到rich的traceback功能展示出了出现异常所在代码行的前几行,方便我们进行查找定位,同时展现出了异常发生时各个变量的值,方便我们排查问题。
虽然我们介绍了这么多令人眼花缭乱的功能,但这仅仅是rich模块诸多功能中的一小部分。不过如果想要实现其他更多的功能,我们需要进行稍微复杂一些的操作,当然只是稍微复杂。由于篇幅所限,我们下期再聊。如果这篇文章对你有所帮助,希望能帮室长点个赞和在看,你的鼓励是室长进步的动力!
【室长原理课】系列在不正经地科普一些互联网小知识,没有太多高深的内容,把这个系列分享给你的朋友吧!