Connect to V2Ray Proxy Network on Chromium Browser on Linux (Raspberry Pi)
Independent ObserverJuly 30, 2022
1. First, you need to have a V2Ray proxy network
You can build it yourself https://github.com/dlgcy/V2Ray_ws-tls_bash_onekey
wget -N --no-check-certificate -q -O install-v2ray.sh "https://raw.githubusercontent.com/wulabing/V2Ray_ws-tls_bash_onekey/master/install.sh" && chmod x install-v2ray.sh && bash install-v2ray.sh
Windows computers can be connected using v2ray N, and Android phones can be connected using v2ray NG.
2. Install and configure v2rayA on Linux system
I installed it on the Raspberry Pi system, and the installation process is omitted.
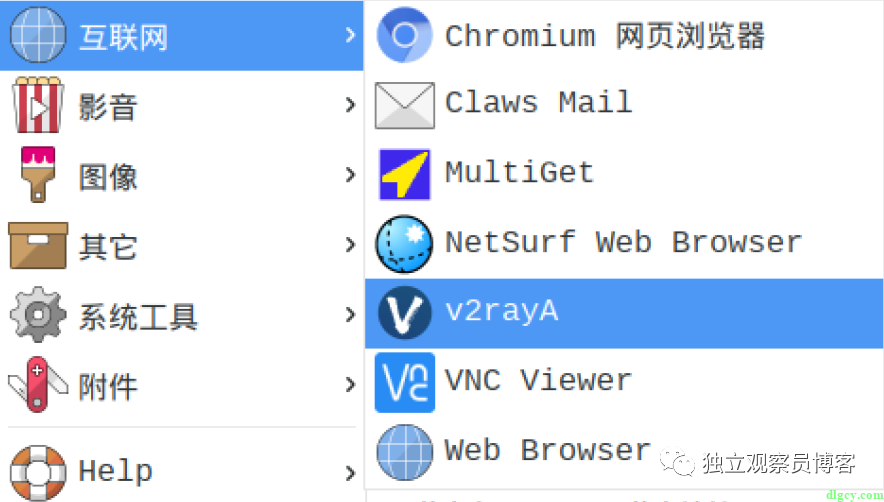
After installation, open it through a browser, configure the Server node (fill in the V2Ray server information) and connect:

Then click Settings in the upper right corner, and choose to close the global transparent proxy :
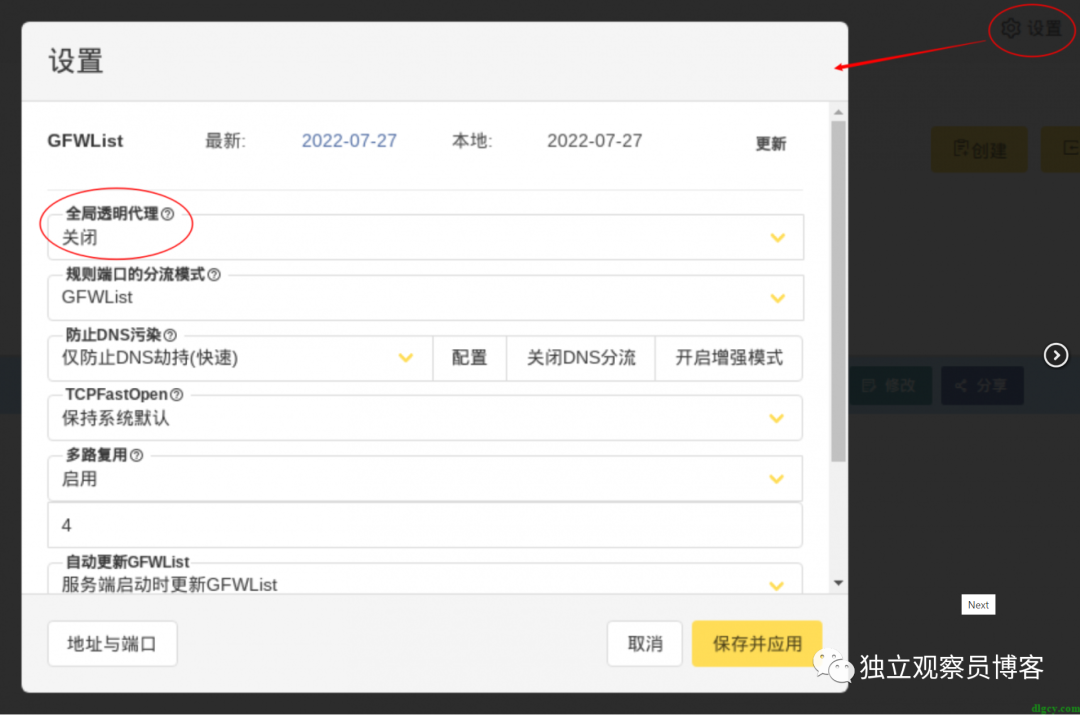
Originally, this function should be more powerful (but I have not succeeded), and after setting, my VNC cannot be connected, even if I set the outbound port whitelist according to its prompt.
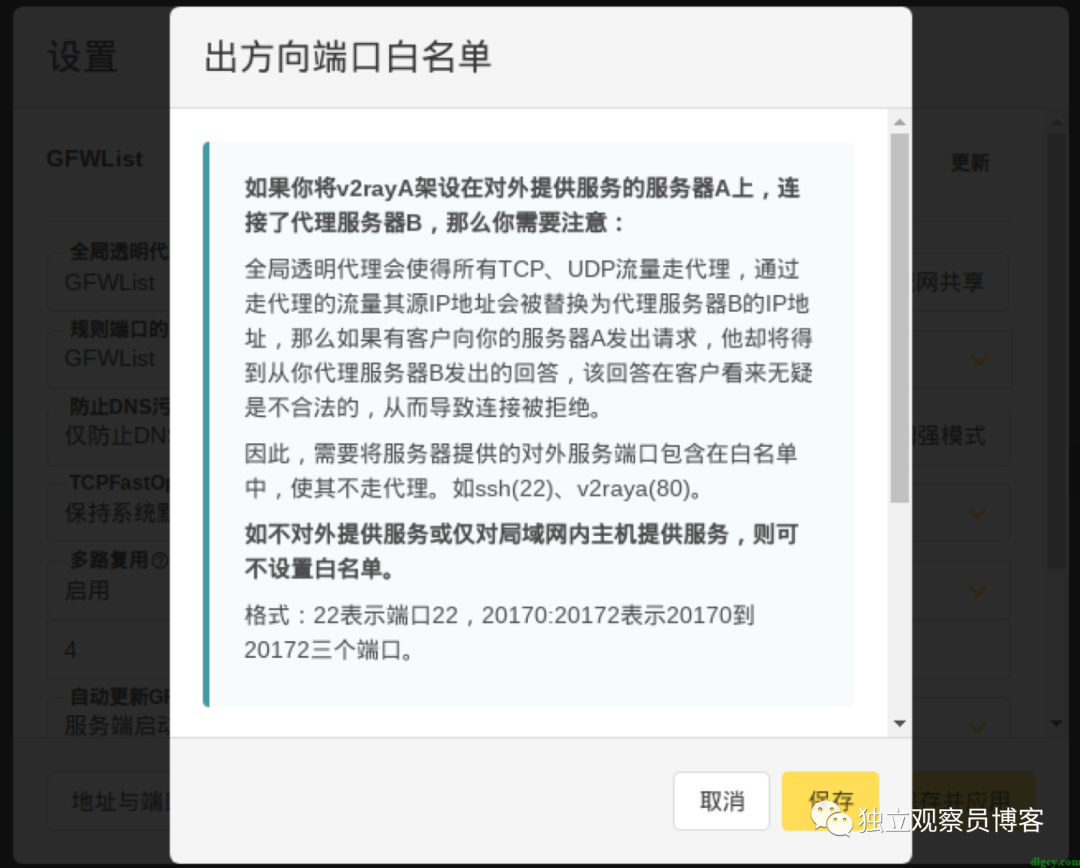
Even its own 2017 port, set up a whitelist, is still inaccessible in the LAN, let alone the VNC port (I heard it is 5900):
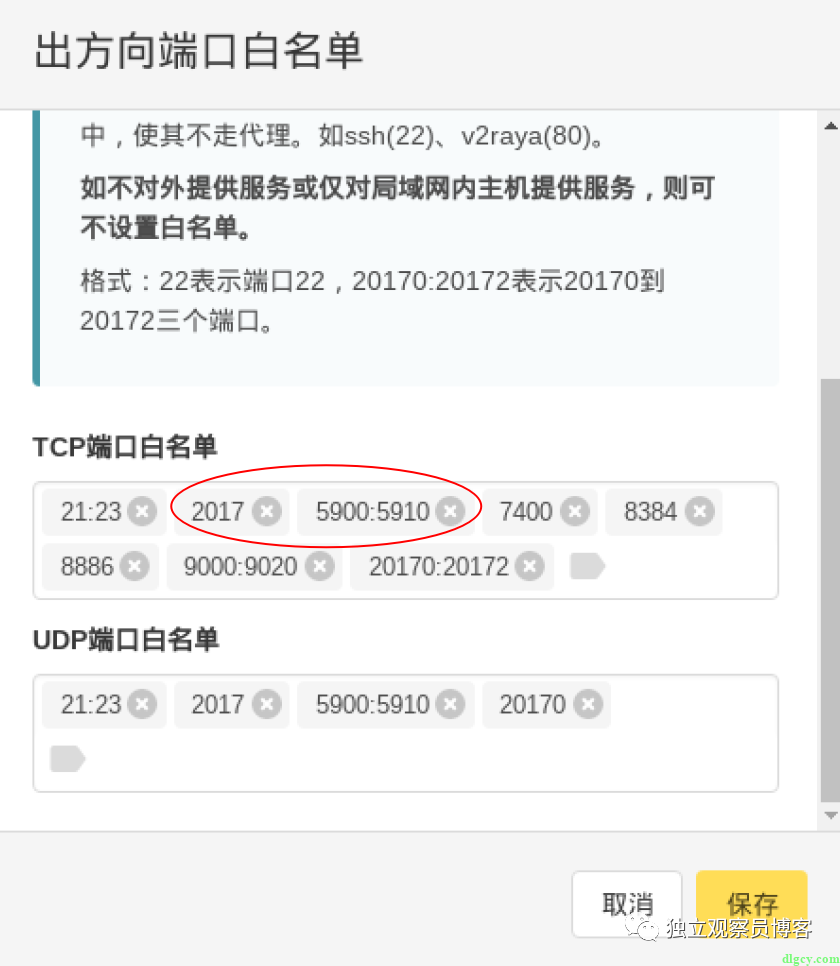
In short, selecting the global transparent proxy option will lead to various failures to connect, and it is still not possible to access Google directly in the system's local browser, so the global transparent proxy cannot be turned on.
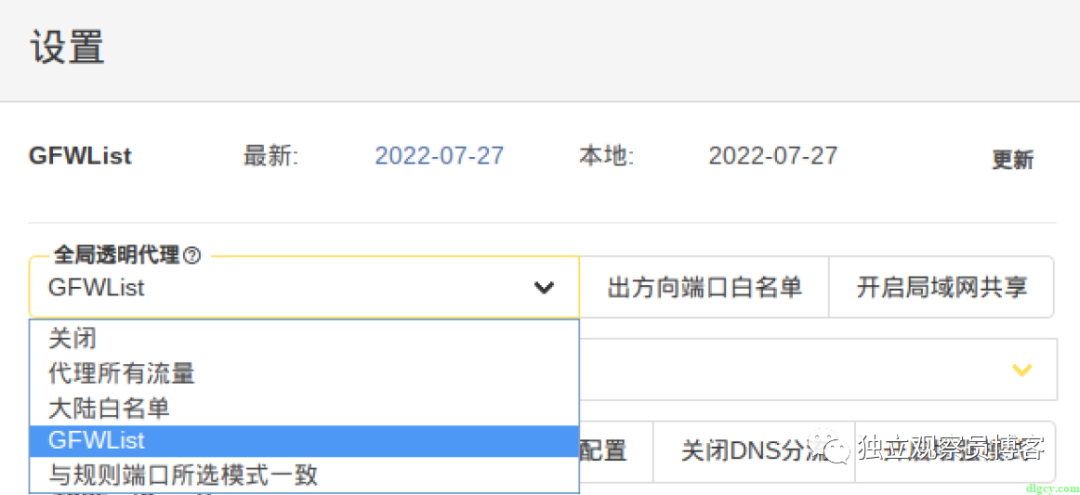
So without using a global transparent proxy, how can we use it? The answer is still in the settings interface, which is hidden in the "Address and Port" in the lower left corner:
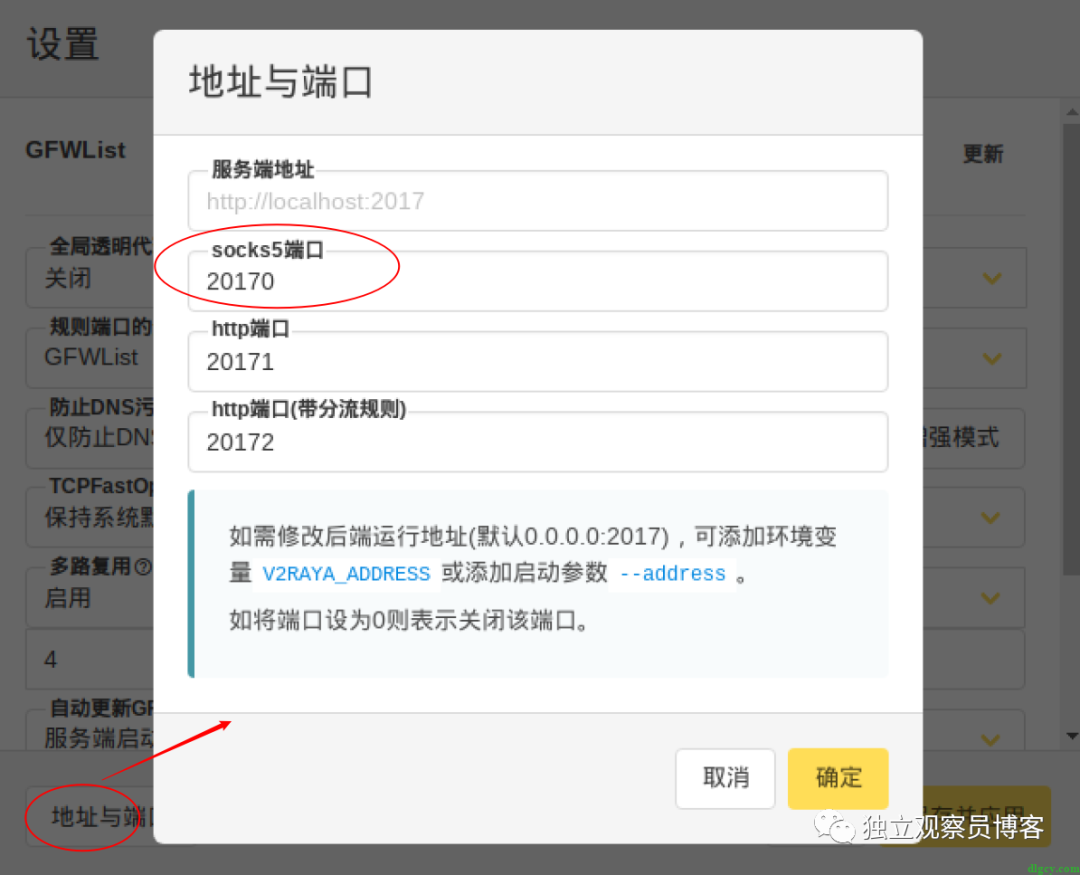
As you can see, it provides us with socks5 port and http port, the latter can only be used for http protocol, socks5 is more low-level and more general. So next we need to find a client that supports Socks5.
3. Install and use the SwitchyOmega browser plug-in
Since I couldn't find a graphical socks client software that can be used under the Raspberry Pi system, I could only turn to the browser plug-in and found that the popular SwitchyOmega is really easy to use. Next, I will introduce how to use it.
3.1 Download and install
Since the proxy has not yet been used, the Chrome App Store and other methods will not work. It is better to download it from the Release of GitHub. The address is as follows:
https://github.com/FelisCatus/SwitchyOmega/releases
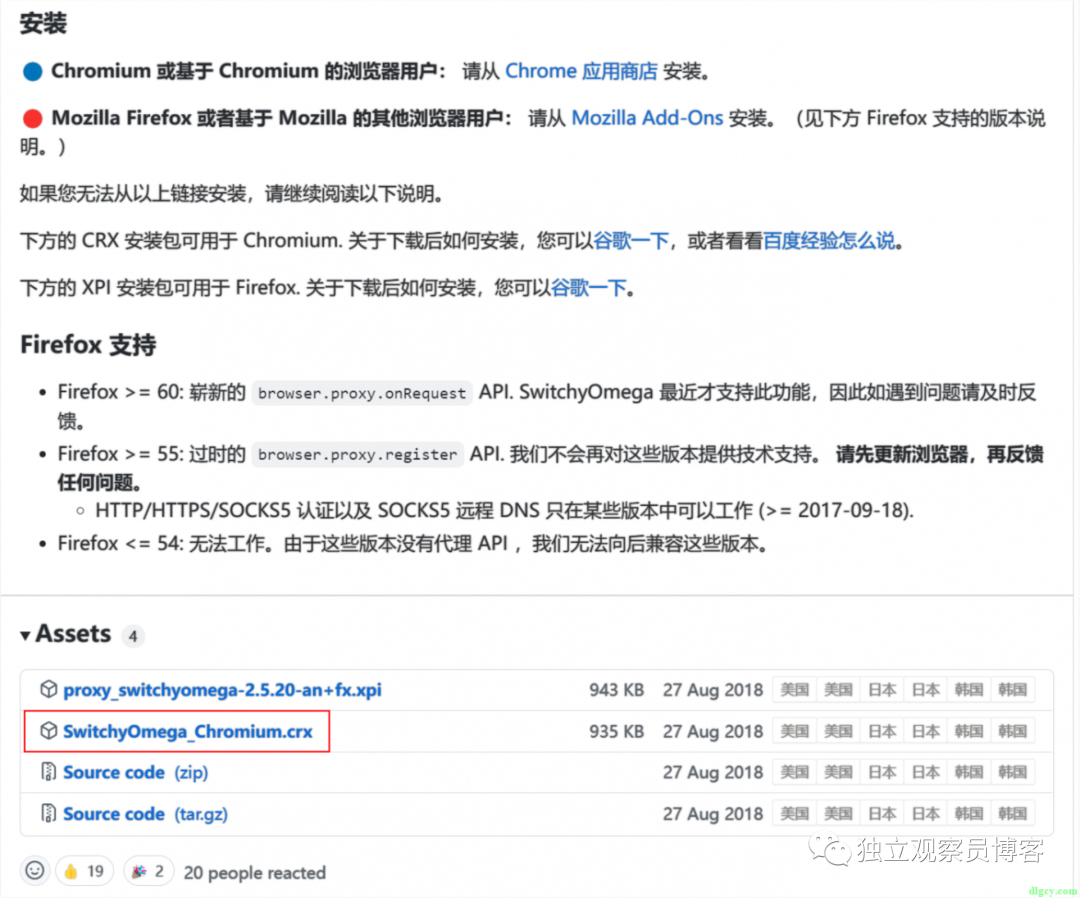
Chromium-based browsers just download the file with the .crx suffix. After downloading, open the extension interface of the Chromium browser, and drag and drop the downloaded crx file directly into the interface to install:
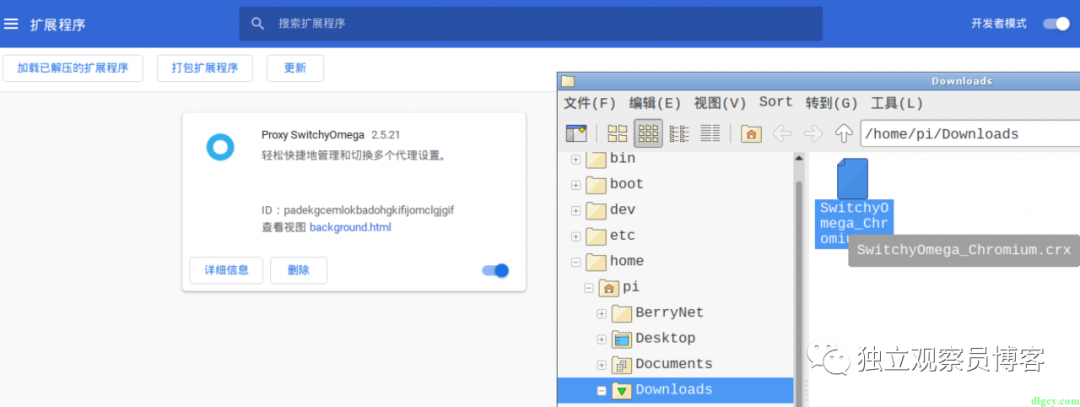
3.2 Configuration use
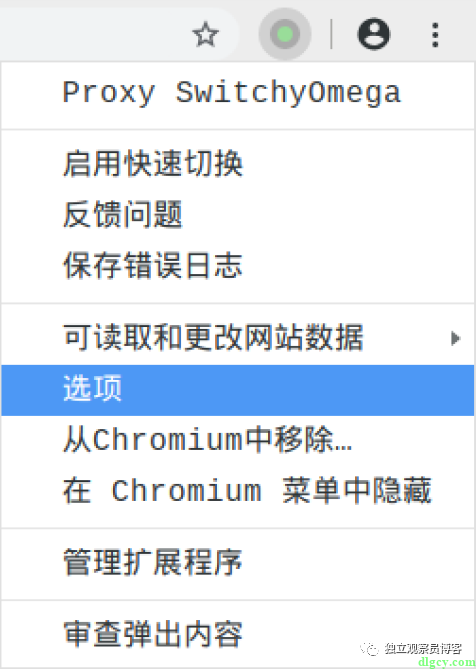
After installation, the extension icon will appear on the browser, right-click to pop up the menu, and click "Options":
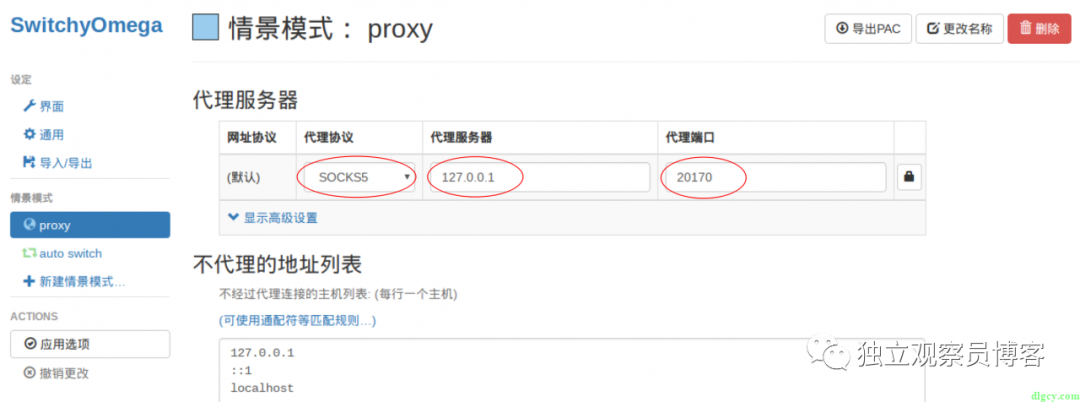
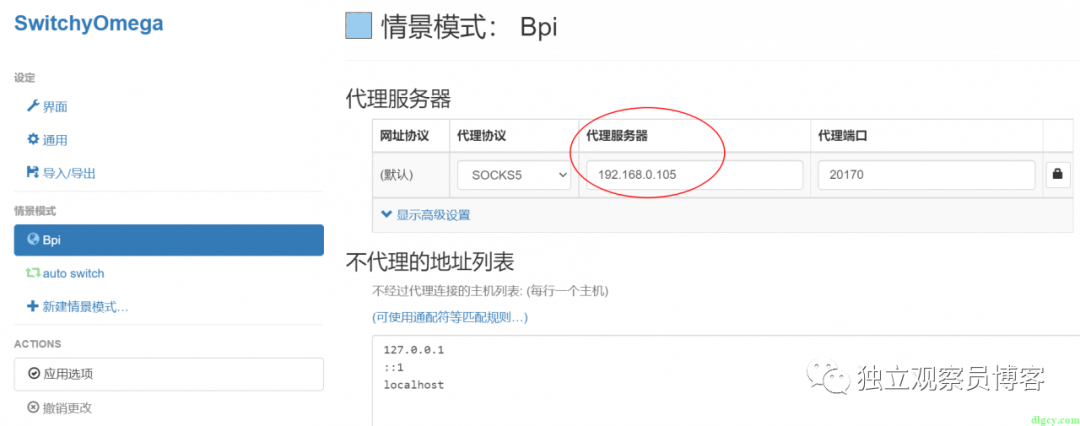
There will be a novice guide, so it is relatively easy to get started. Here we directly change the information in the default scenario mode " proxy " to the socks5 port information of v2rayA configured earlier:
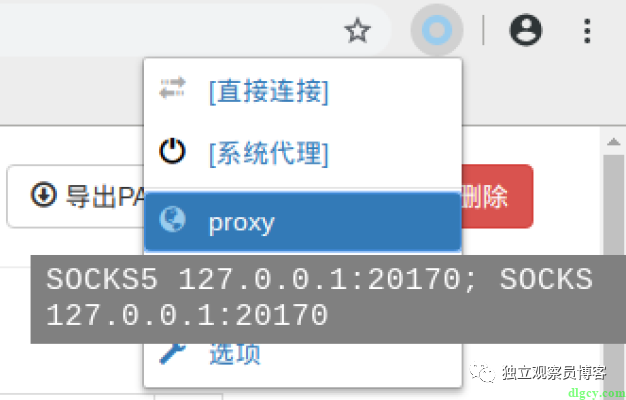
Now we click directly on the plugin icon and select the previous profile " proxy " in the drop-down menu:
Now let's try visiting a website that doesn't exist, Google:
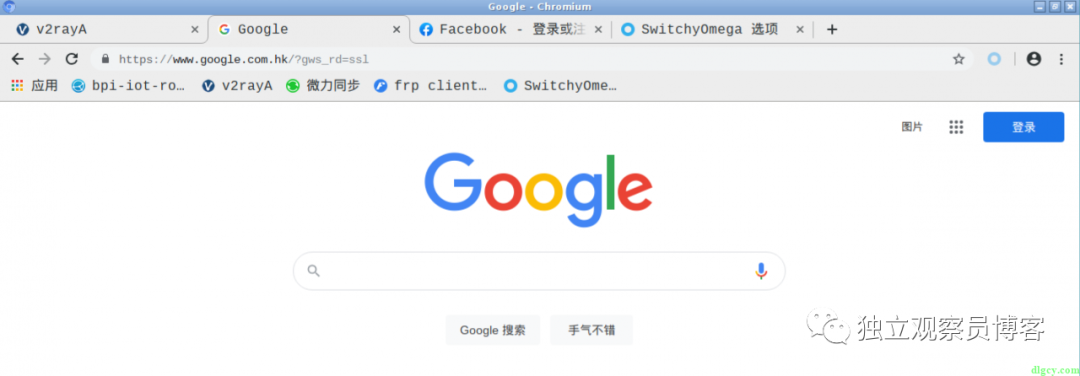
Facebook:
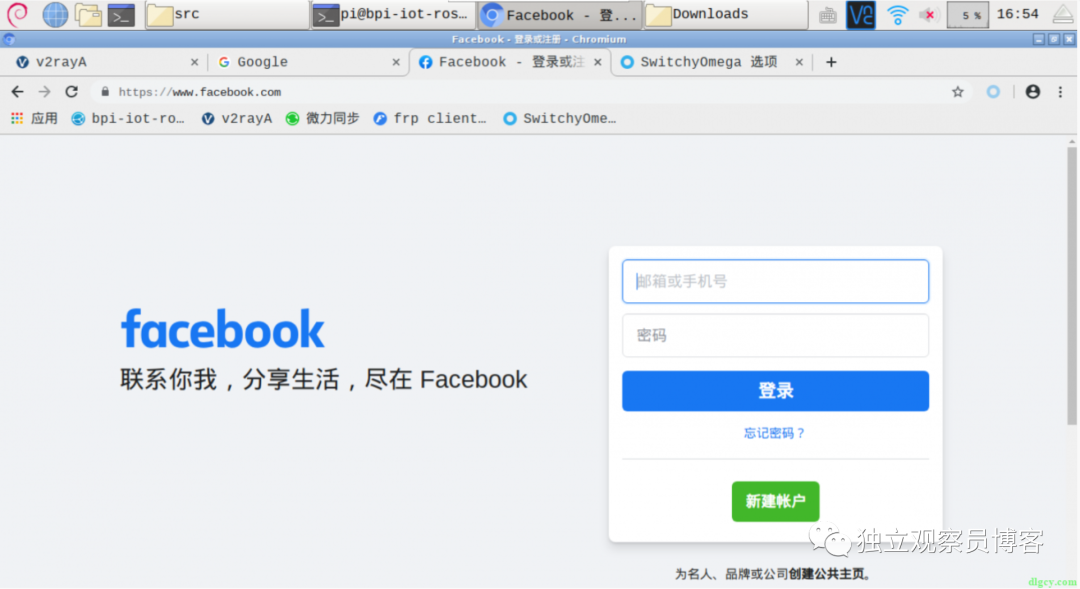
As you can see, it's all perfect. Of course, SwitchyOmega said that the credit is mainly from v2rayA, v2rayA said that the credit is mainly to V2Ray, and V2Ray said that the credit is mainly from the server "Dogyun (https://www.dogyun.com/?ref=mydog)"... The scene was peaceful atmosphere.
In addition, other computers (Windows 11, Edge) under the LAN have also been successfully used:
3.3 Automatic switching
The type of scenario mode described above is the "proxy server" mode, which means that when enabled, all traffic of the browser passes through the proxy server, which will cause slow or inaccessible websites that do not need a proxy. So how to solve it? The plug-in author naturally provided a method, and he prepared four types of scenarios for us:
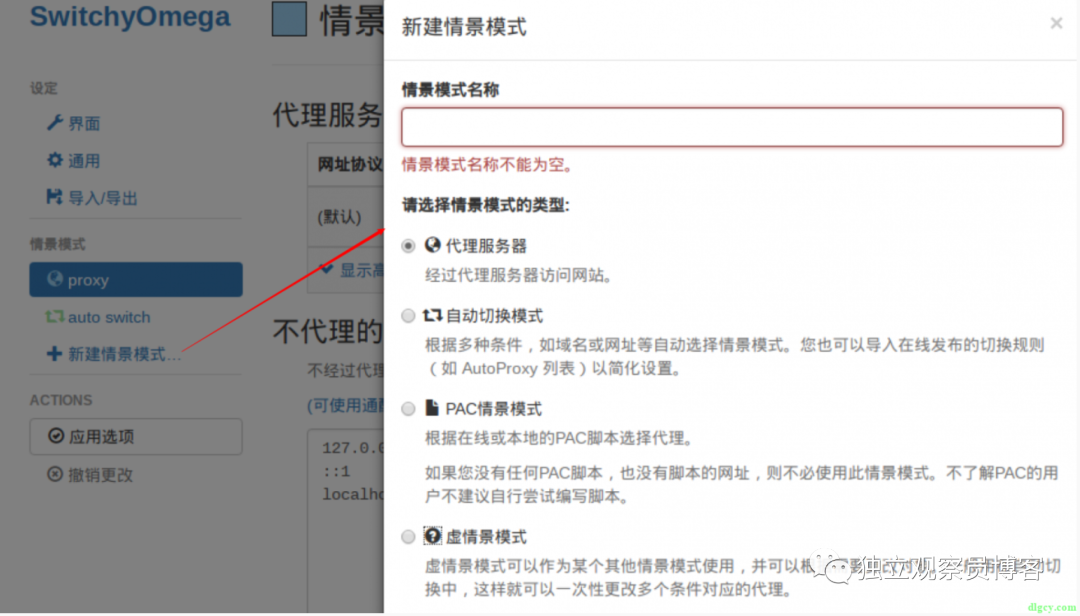
What we need is "auto switch mode", and the author also kindly helped us create it by default, called "auto switch", then let's open the editing directly! Um. . . Let's take a look at the beginner's guide:
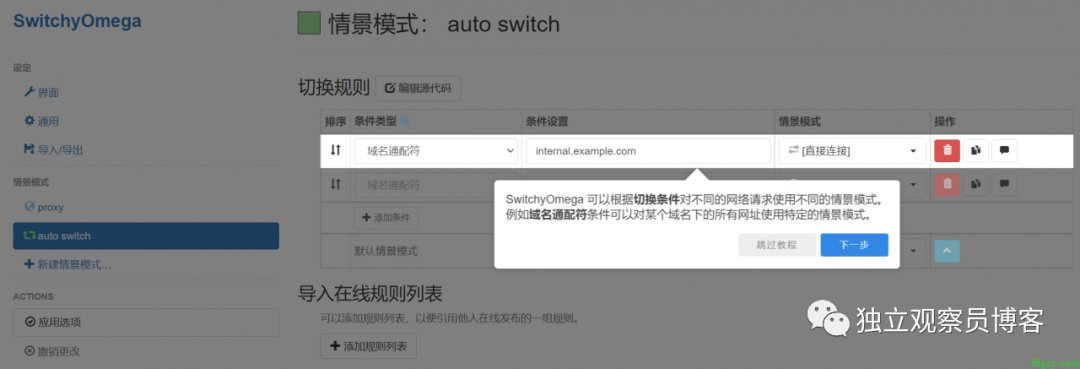
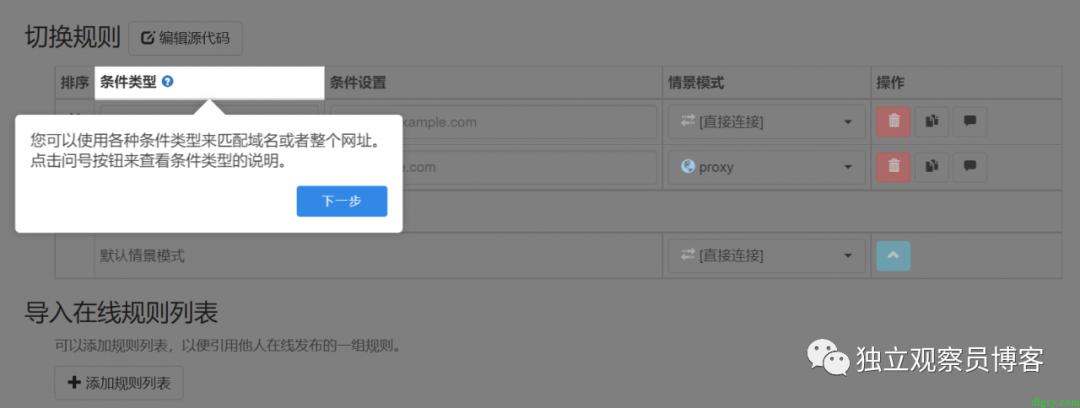


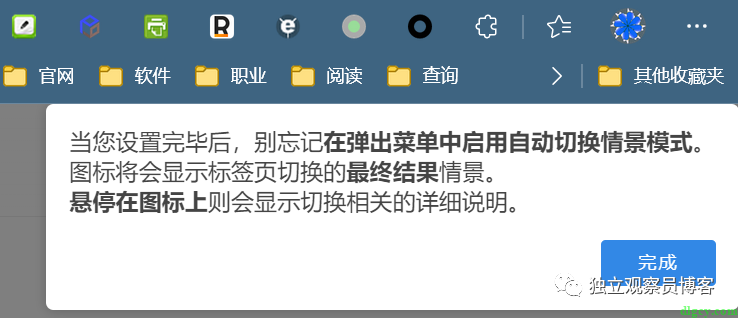
Is it very clear, hahaha, then I won't repeat it, and then I will talk about "importing the online rule list".
Click the "Add Rule List" button:
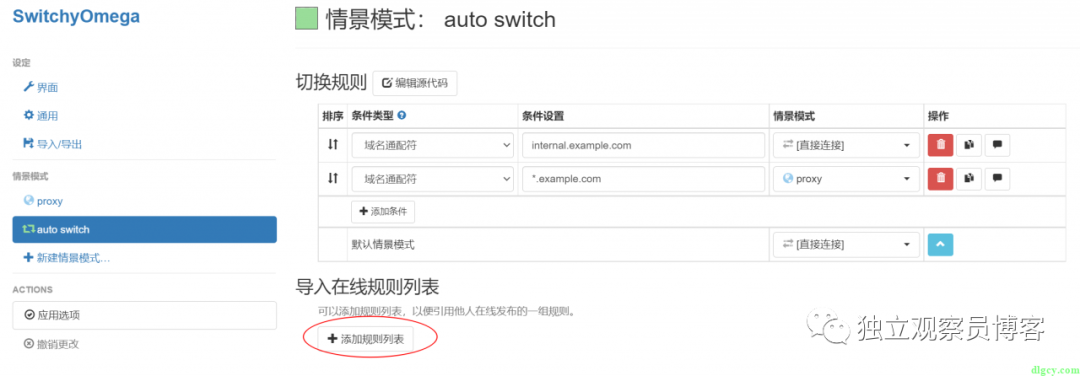
Select the profile of the "Rule List Rules" line as the previously configured "proxy", and then select "AutoProxy" for the "Rule List Format":
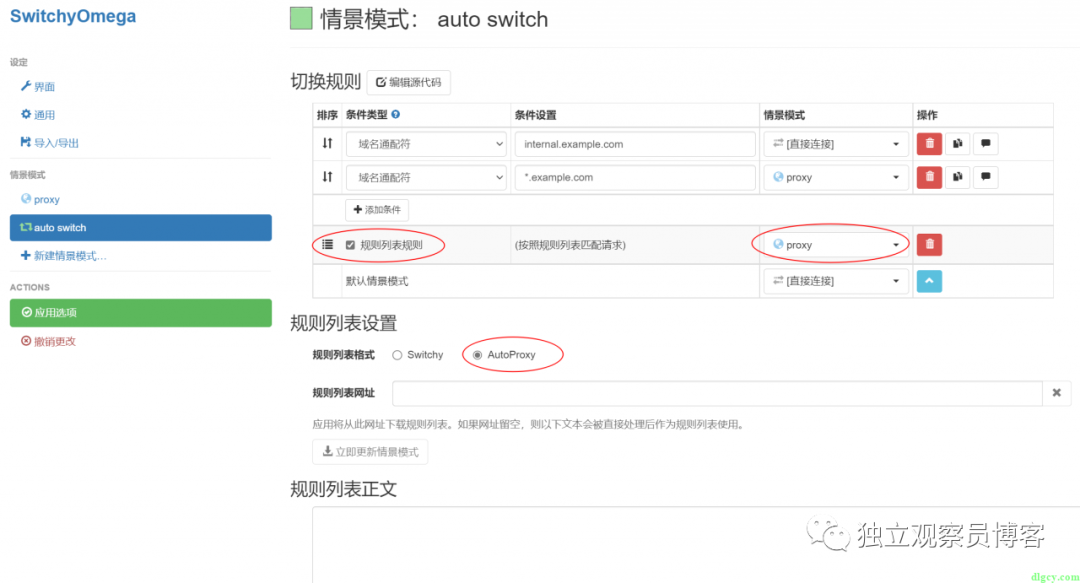
Found the following rule list URL from the Internet:
https://raw.githubusercontent.com/gfwlist/gfwlist/master/gfwlist.txt
After filling in the fields, click the "Update Profile Now" button:
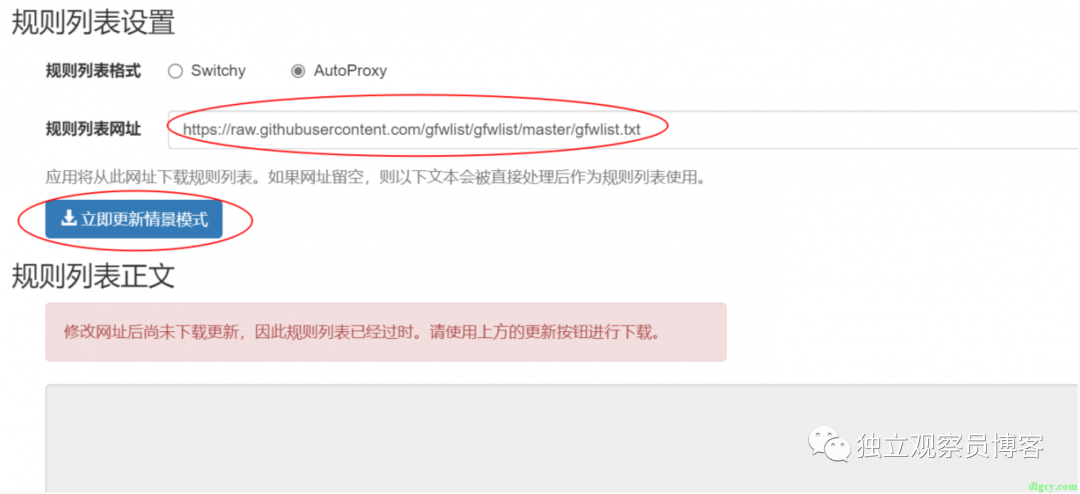
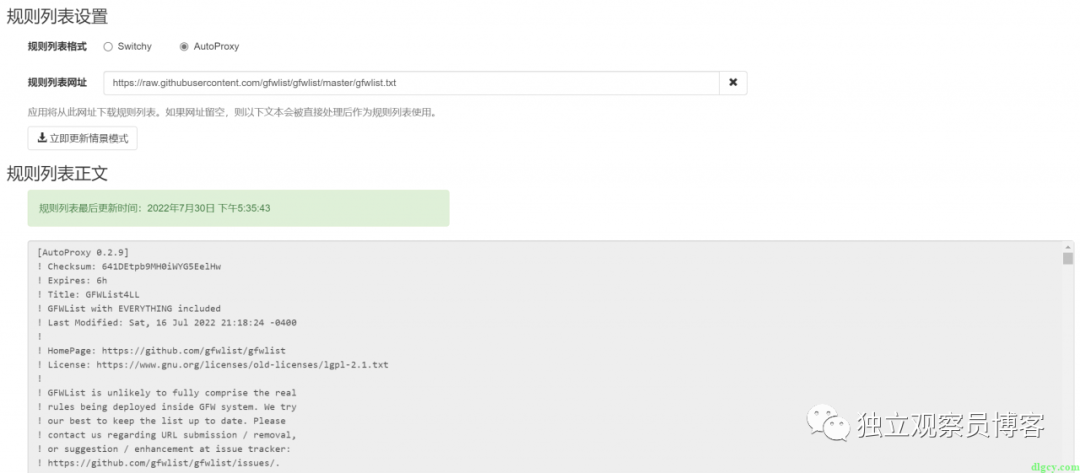
Note that the update needs to be performed when the proxy is connected (according to the previous steps, it is currently connected), otherwise the update may fail. After the update is successful, there is content in the body of the rule list:
Then we click the extension icon, switch the profile to "auto switch", and you can play happily:
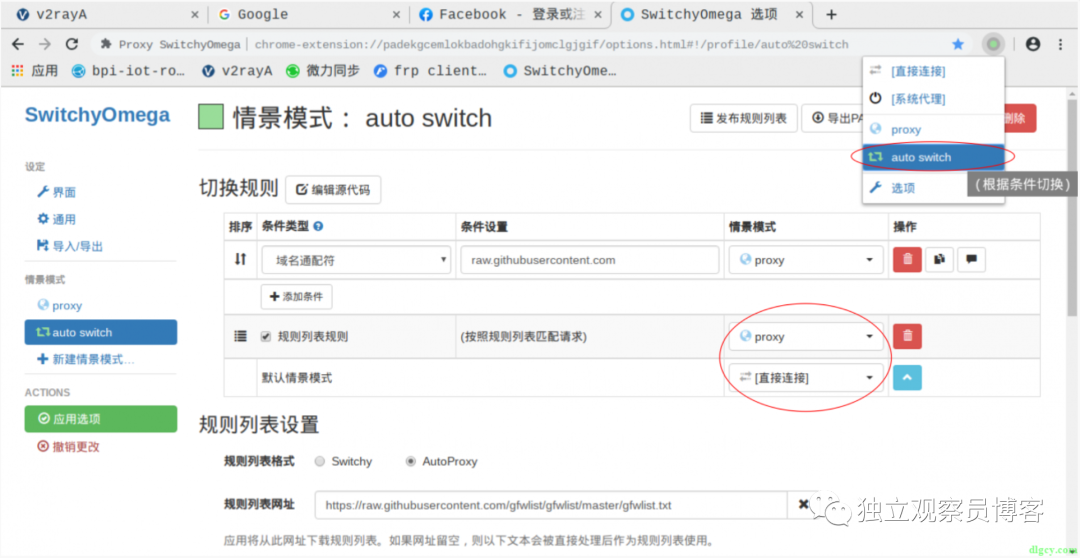
You can do an experiment. On the Facebook page, move the mouse over the extension icon to show that the "auto switch" is currently used, but facebook.com matches the "proxy" profile, that is, proxy:

When visiting the WeChat official account article page, and moving the mouse up, it shows that "auto switch" matches "direct connection":
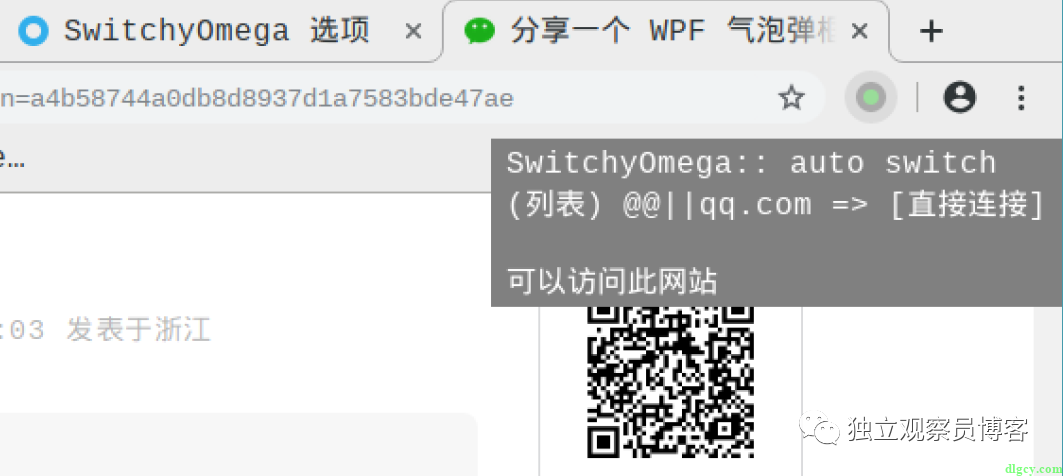
And the icons in the two cases are different, the author is really attentive.
The full text is complete.
WordPress
WordPress website uses "WeChat Robot Premium" plugin to connect WeChat public account
WordPress adds the function of displaying related articles in the sidebar
Self-use WordPress plugin recommendation Ⅱ
Windows
Windows 11 and its Android subsystem tossing notes
IIS error resolution: The current identity does not have write access to Temporary ASP.NET Files
Build Frp to Remote Intranet Windows and Linux Machines
The most stable DLNA music player recommended for Windows
The solution to the forgotten password of the Windows login local account
Use ngrok to connect to the remote desktop of the internal network from the external network
other
Simple use of MSBuild commands
Build and configure Jenkins on Windows and then compile and package the VS project
Use GB28181.Solution + ZLMediaKit + MediaServerUI for camera streaming and playback
Synchronize Chrome -like browser bookmarks with the Floccus plugin and Nut Cloud
A preliminary study on the use of Docker Hub
"Independent Observer" Personal Viewing II
VisualStudio uses DialogPage to store configuration information