project description
Development environment: PyCharm, python3.7, MySQL5.5
Technology used: The server is developed using Flask, and the front-end is implemented using Layui and Markdown editors.
The project contains the following functions:
-
Registration: Register an account
-
Login: log in with the account password
-
Blogging: Blogging is done using the Markdown editor. Can publish your own blog -
My Blogs: View and manage your own blogs -
My Comments: View and moderate all of your comments -
change Password -
View Blog List: View all published blogs
-
Blog details page: View blog content and comment information, and you can comment on the current blog
-
about
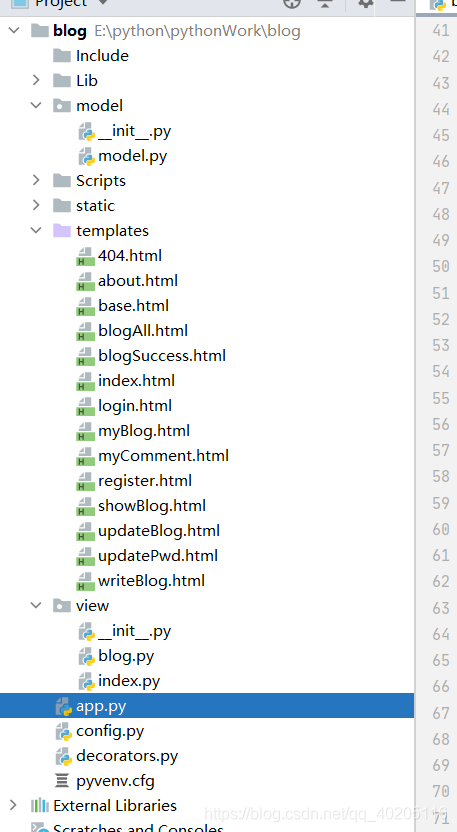
project directory
Database Design
A total of three tables are designed in the database: user table, blog table, and comment table.
The mapping relationship between the tables is as follows:
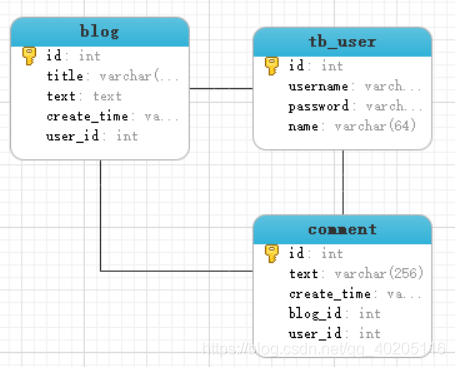
One-to-many relationship between user table and blog table; one-to-many relationship between user and comment table; one-to-many relationship between blog table and comment table.
The model class code of its table is as follows:
class User(db.Model):
    # 设置表名
    __tablename__ = 'tb_user';
    # id,主键并自动递增
    id = db.Column(db.Integer, primary_key=True, autoincrement=True)
    username = db.Column(db.String(64), unique=True)
    password = db.Column(db.String(256), nullable=True)
    name = db.Column(db.String(64))

    # 设置只可写入,对密码进行加密
    def password_hash(self, password):
        self.password = generate_password_hash(password);

class Blog(db.Model):
    __tablename__ = 'blog'
    id = db.Column(db.Integer, primary_key=True, autoincrement=True)
    title = db.Column(db.String(128))
    text = db.Column(db.TEXT)
    create_time = db.Column(db.String(64))
    #关联用户id
    user_id = db.Column(db.Integer, db.ForeignKey('tb_user.id'))
    user = db.relationship('User', backref='user')

class Comment(db.Model):
    __tablename__ = 'comment'
    id = db.Column(db.Integer, primary_key=True, autoincrement=True)
    text = db.Column(db.String(256))    # 评论内容
    create_time = db.Column(db.String(64))
    # 关联博客id
    blog_id = db.Column(db.Integer, db.ForeignKey(blog.id))
    # 关联用户id
    user_id = db.Column(db.Integer, db.ForeignKey(tb_user.id))
    blog = db.relationship(Blog, backref=blog)
    user = db.relationship(User, backref=use)
Function realization
Page basic template implementation
The page uses the Jinja2 template, and Jinja2 supports page inheritance, so we can write the repetitive page code of the navigation bar in one file. Here we first create a base.html file and write the general framework of the page. Other modules can be directly inherited and used.
<!DOCTYPE html>
<html lang=en>
<head>
    <meta charset=UTF-8>
    <title>
        {% block title %}
            {# 其他页面可以重写标题 #}
        {% endblock %}
    </title>
    <link rel=stylesheet href=/static/layui/css/layui.css>
    <link rel=stylesheet href=/static/css/base.css>
    <script src=/static/js/jquery.js></script>
    <script src=/static/layui/layui.js></script>
    {% block css %}
    {% endblock %}
</head>
<body>
<div id=bg></div>
<ul class=layui-nav lay-filter=>
    <li class=layui-nav-item><a href=/>在线博客平台</a></li>
    {% if username %}
        <li class=layui-nav-item{% block updatepwd_class %}{% endblock %}><a href=/updatePwd>修改密码</a></li>
    {% endif %}
    <li class=layui-nav-item{% block blog_class %}{% endblock %}><a href=/blog/blogAll>博客</a></li>
    <li class=layui-nav-item{% block about_class %}{% endblock %}><a href=/about>关于</a></li>
    {% if username %}
        <li class=layui-nav-item style=float: right; margin-right: 30px;>
            <a href=javascript:;>{{ name }}</a>
            <dl class=layui-nav-child>
                <dd><a href=/blog/myBlog>我的博客</a></dd>
                <dd><a href=/blog/myComment>我的评论</a></dd>
                <dd><a href=/logout>注销</a></dd>
            </dl>
        </li>
        <li class=layui-nav-item{% block write_class %}{% endblock %} style=float: right><a href=/blog/writeBlog>写博客</a></li>
    {% else %}
        <li class=layui-nav-item{% block register_class %}{% endblock %} style=float: right><a href=/register>注册</a></li>
        <li class=layui-nav-item{% block login_class %}{% endblock %} style=float: right><a href=/login>登录</a></li>
    {% endif %}
</ul>

<div class=content>
    {% block content %}
        {# 其他页面内容 #}
    {% endblock %}
</div>

<script>
layui.use('element', function(){
    var element = layui.element;
});
</script>
</body>
</html>
This page uses Layui to define a navigation bar and displays the corresponding function modules. Among them, {% if username %}, username is a key-value pair stored in the session in the background, which is used to determine whether the user is logged in, and some functions are displayed after logging in.
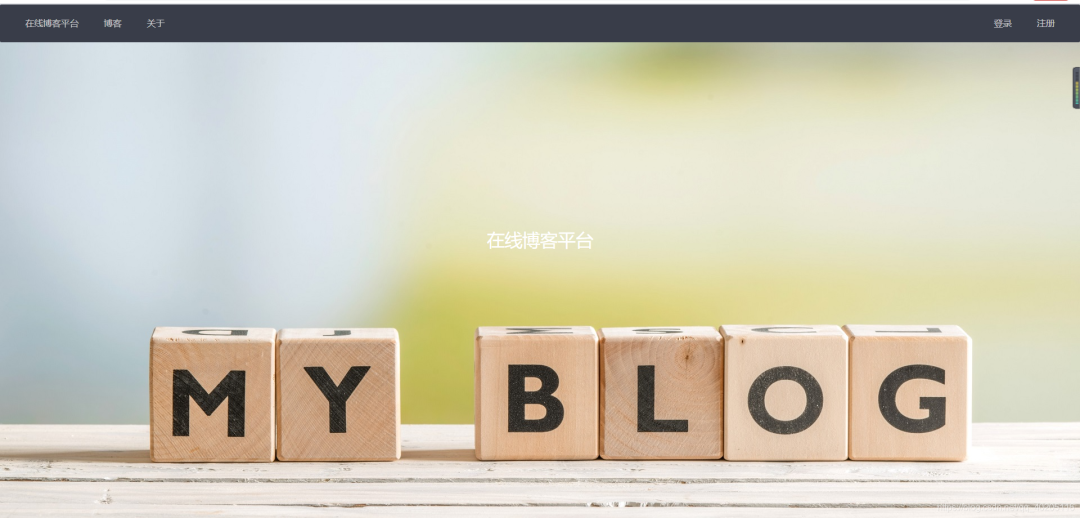
After the base.html template file is completed, we define an index.html to be the homepage of the project and directly inherit base.html. In this way, the homepage index.html saves a lot of code. as follows:
{% extends 'base.html' %}

{% block title %}
    在线博客平台
{% endblock %}

{% block content %}
    <h1 style=margin: 35vh;>在线博客平台</h1>
{% endblock %}
The homepage effect is as follows:
Login and Register Features
Log in
First define a login view function, which can receive GET and POST requests. The GET request is to jump to the login page, and the POST request is to process the request submitted by the login to verify whether the login is successful. After the login is successful, the user name of the current login object is stored in session session.
# 登录请求
@index.route('/login', methods=['POST', 'GET'])
def login():
    if request.method == 'GET':
        return render_template('login.html')
    if request.method == 'POST':
        username = request.form.get('username')
        password = request.form.get('password')
        user = User.query.filter(User.username == username).first();
        # check_password_hash比较两个密码是否相同
        if (user is not None) and (check_password_hash(user.password, password)):
            session['username'] = user.username
            session.permanent = True
            return redirect(url_for('index.hello'))
        else:
            flash(账号或密码错误)
            return render_template('login.html');
The login page is a set of forms written in Layui, which is also the basic base.html. The code is as follows:
{% extends 'base.html' %}

{% block title %}
    在线博客平台.登录
{% endblock %}

{% block css %}
<link rel=stylesheet href=/static/css/register.css>
{% endblock %}

{% block content %}
    <div class=register>
        <h1>登录</h1>
        <p class=tip>
            {% for item in get_flashed_messages() %}
            {{ item }}
            {% endfor %}
        </p>
        <form class=layui-form action=login method=post>
            <div class=layui-form-item>
                <label class=layui-form-label>用户名</label>
                <div class=layui-input-block>
                    <input type=text name=username required  lay-verify=required placeholder=请输入用户名 class=layui-input>
                </div>
            </div>
            <div class=layui-form-item>
                <label class=layui-form-label>密  码</label>
                <div class=layui-input-block>
                    <input type=password name=password required lay-verify=required placeholder=请输入密码 class=layui-input>
                </div>
            </div>
            <div class=layui-form-item>
                <div class=layui-input-block>
                    <button class=layui-btn lay-submit lay-filter=formDemo>立即提交</button>
                    <button type=reset class=layui-btn layui-btn-primary>重置</button>
                </div>
            </div>
        </form>
    </div>
    <script>
        layui.use('form', function(){
            var form = layui.form;
            form.on('submit(formDemo)', function(data){
            });
        });
    </script>
{% endblock %}

{% block login_class %}
    layui-this
{% endblock %}
The effect is as follows (if the account number and password are wrong, there will be a corresponding prompt message): 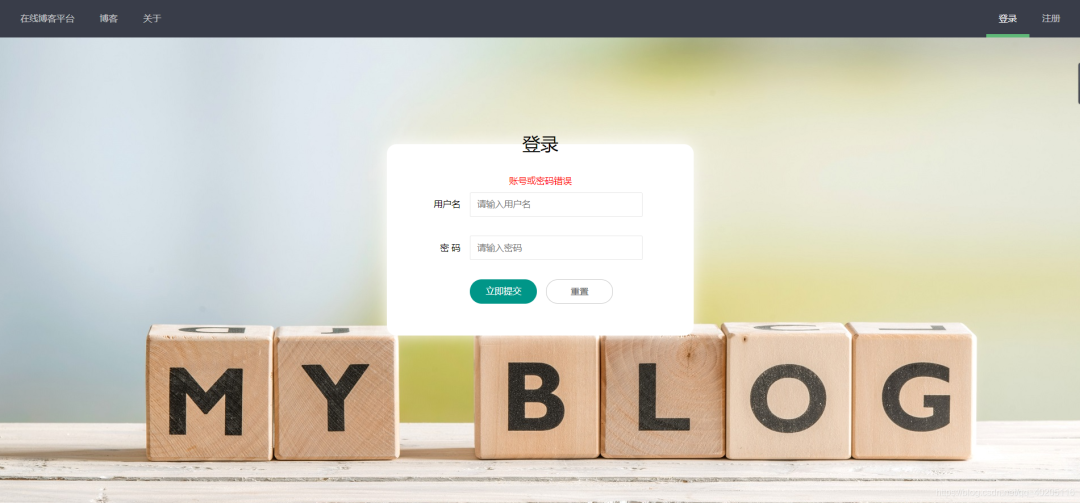
registration and login are similar, and the pages use the same css style file, so the code is posted here. If you need it, you can download the complete project code yourself: GitHub address.
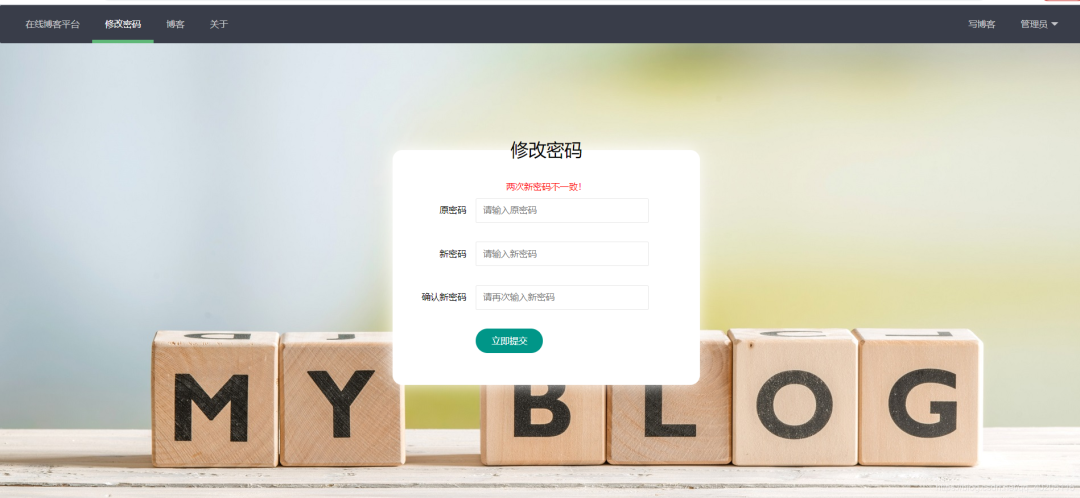
change Password
Modify the password module, because it is very insecure to store plaintext passwords in the database, so Werkzeug is used here to encrypt and store the passwords. If you want to know more about WerkZeug password encryption, you can visit Flask to implement password encryption using Werkzeug.
Because the encrypted password is stored in the database, it is necessary to use the check_password_hash function to judge whether the original password is correct.
Define a view function that modifies the password.
# 修改密码
@index.route(/updatePwd, methods=['POST', 'GET'])
@login_limit
def update():
    if request.method == GET:
        return render_template(updatePwd.html)
    if request.method == 'POST':
        lodPwd = request.form.get(lodPwd)
        newPwd1 = request.form.get(newPwd1)
        newPwd2 = request.form.get(newPwd2)
        username = session.get(username);
        user = User.query.filter(User.username == username).first();
        if check_password_hash(user.password, lodPwd):
            if newPwd1 != newPwd2:
                flash(两次新密码不一致!)
                return render_template(updatePwd.html)
            else:
                user.password_hash(newPwd2)
                db.session.commit();
                flash(修改成功!)
                return render_template(updatePwd.html)
        else:
            flash(原密码错误!)
            return render_template(updatePwd.html)
The page style file is the same as the style file introduced by the login registration (the original password is incorrect or the two new passwords are different, the corresponding prompt information will be given), the code is as follows:
{% extends 'base.html' %}

{% block title %}
    在线博客平台.修改密码
{% endblock %}

{% block css %}
<link rel=stylesheet href=/static/css/register.css>
{% endblock %}

{% block content %}
    <div class=register>
        <h1>修改密码</h1>
        <p class=tip>
            {% for item in get_flashed_messages() %}
            {{ item }}
            {% endfor %}
        </p>
        <form class=layui-form action=updatePwd method=post>
            <div class=layui-form-item>
                <label class=layui-form-label>原密码</label>
                <div class=layui-input-block>
                    <input type=password name=lodPwd required  lay-verify=required placeholder=请输入原密码 class=layui-input>
                </div>
            </div>
            <div class=layui-form-item>
                <label class=layui-form-label>新密码</label>
                <div class=layui-input-block>
                    <input type=password name=newPwd1 required lay-verify=required placeholder=请输入新密码 class=layui-input>
                </div>
            </div>
            <div class=layui-form-item>
                <label class=layui-form-label>确认新密码</label>
                <div class=layui-input-block>
                    <input type=password name=newPwd2 required lay-verify=required placeholder=请再次输入新密码 class=layui-input>
                </div>
            </div>
            <div class=layui-form-item>
                <div class=layui-input-block>
                    <button class=layui-btn lay-submit lay-filter=formDemo>立即提交</button>
                </div>
            </div>
        </form>
    </div>
    <script>
        layui.use('form', function(){
            var form = layui.form;
            form.on('submit(formDemo)', function(data){
            });
        });
    </script>
{% endblock %}

{% block updatepwd_class %}
    layui-this
{% endblock %}
The effect is as follows:
write a blog
When writing a blog, fields such as title, blog content, and current time will be saved in the blog table. The following is the view function for blogging.
# 写博客页面
@blog.route('/writeBlog', methods=['POST', 'GET'])
@login_limit
def writeblog():
if request.method == 'GET':
return render_template('writeBlog.html')
if request.method == 'POST':
title = request.form.get(title)
text = request.form.get(text)
username = session.get('username')
# 获取当前系统时间
create_time = time.strftime(%Y-%m-%d %H:%M:%S)
user = User.query.filter(User.username == username).first()
blog = Blog(title=title, text=text, create_time=create_time, user_id=user.id)
db.session.add(blog)
db.session.commit();
blog = Blog.query.filter(Blog.create_time == create_time).first();
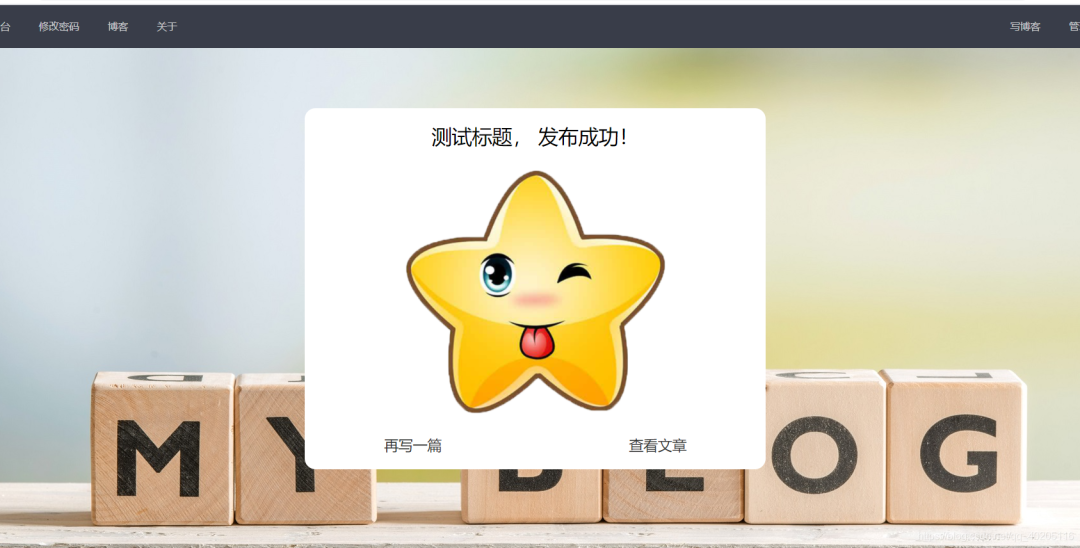
return render_template('blogSuccess.html', title=title, id=blog.id)
When saving a blog, the current system time will be obtained, which is used as the publishing time of the blog. After the blog is successfully saved, it will return to the save success page, which will be explained below.
Write the html file corresponding to the blog, the code is as follows.
{% extends 'base.html' %}

{% block title %}
    在线博客平台.写博客
{% endblock %}

{% block css %}
<link rel=stylesheet type=text/css href=/static/editor/css/editormd.css/>
<script src=/static/editor/editormd.js type=text/javascript></script>
{% endblock %}

{% block content %}
    <div class=main>
        <form action=/blog/writeBlog class=layui-form method=post>
            <div class=layui-form-item>
                <label class=layui-form-label>标   题</label>
                <div class=layui-input-block>
                    <input type=text name=title  lay-verify=required placeholder=请输入标题 class=layui-input>
                </div>
            </div>
            <div id=editormd>
                <textarea name = text lay-verify=required style=display:none; ></textarea>
            </div>
            <div class=layui-form-item>
                <div class=layui-input-block>
                    <button class=layui-btn style=width: 150px lay-submit lay-filter=formDemo>保存</button>
                </div>
            </div>
        </form>
    </div>

    <script type=text/javascript>
        layui.use('form', function(){
            var form = layui.form;
            form.on('submit(formDemo)', function(data){
            });
        });

        $(function() {
            editormd(editormd, {
                width: 100%,
                height: 600,
                syncScrolling: single,
                path: /static/editor/lib/, //依赖lib文件夹路径
                emoji: true,
                taskList: true,
                tocm: true,
                imageUpload: true, //开启本地图片上传
                imageFormats: [jpg, jpeg, gif, png], //设置上传图片的格式
                imageUploadURL: /blog/imgUpload  //上传图片请求路径
            });
        });
    </script>
{% endblock %}

{% block write_class %}
    layui-this
{% endblock %}
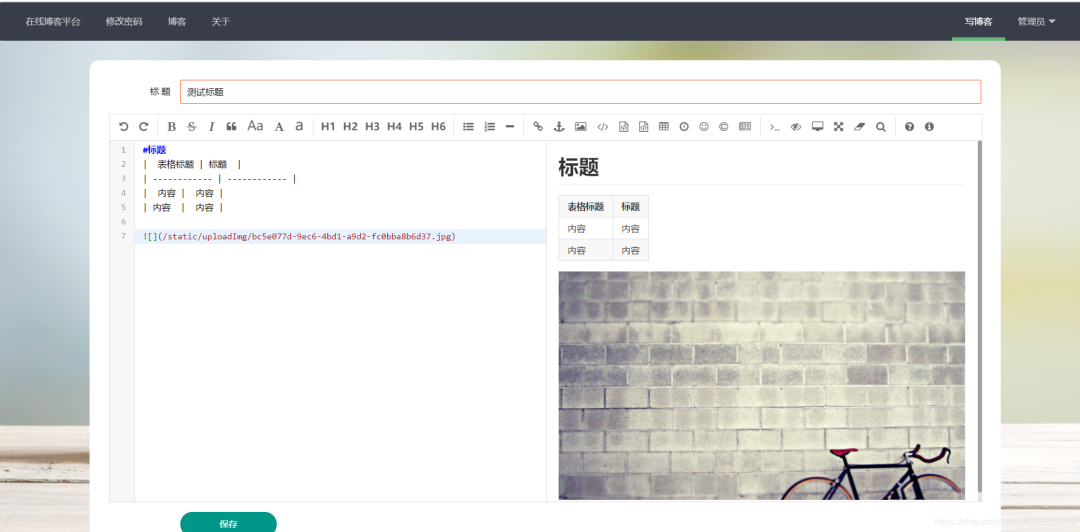
The Markdown editor is used here for blogging. For the Markdown editor, I wrote an article on how to use Markdown before, but the back end uses the Java language. Interested friends can take a look at the basic use of Markdown. The difference between Flask is that the backend receives Markdown to upload pictures with different sentences. Flask receives Markdown to upload pictures:
file = request.files.get('editormd-image-file');
Others are basically the same. After all, Markdown belongs to the front-end knowledge, and the back-end only needs to return data according to the specified format.
Because Markdown supports image upload, there must be a file upload method. Define a view function for file upload as follows (it should be noted here that Markdown uploads images using the POST method).
# 上传图片
@blog.route('/imgUpload', methods=['POST'])
@login_limit
def imgUpload():
    try:
        file = request.files.get('editormd-image-file');
        fname = secure_filename(file.filename);
        ext = fname.rsplit('.')[-1];
        # 生成一个uuid作为文件名
        fileName = str(uuid.uuid4()) + . + ext;
        filePath = os.path.join(static/uploadImg/, fileName);
        file.save(filePath)
        return {
            'success': 1,
            'message': '上传成功!',
            'url': / + filePath
        }
    except Exception:
        return {
            'success': 0,
            'message': '上传失败'
        }
If you are unfamiliar with the above file upload code, you can visit Flask file upload and download to learn more about Flask file upload and download.
The effect is as follows:
After the save is successful, it will return to the save success page, you can write an article, or view the currently published article.
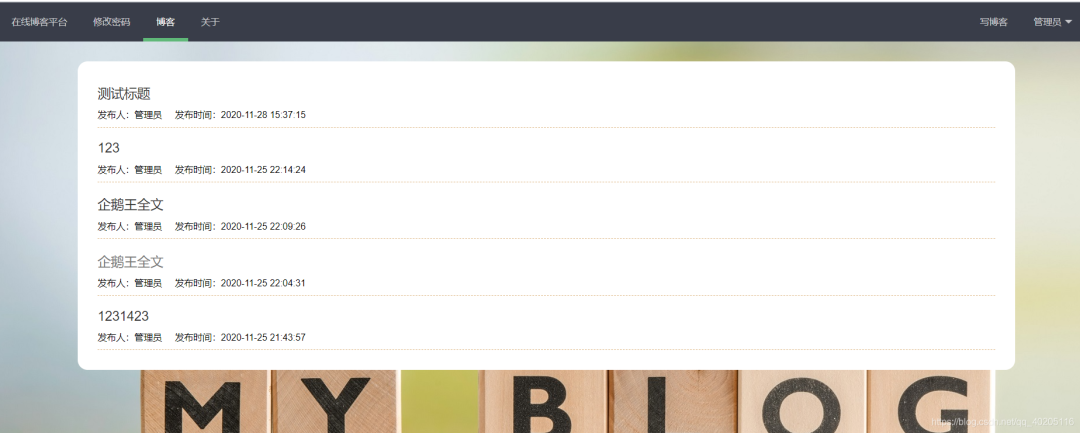
View Blog List
Viewing a list of blogs is to iterate over all published blogs. First define a view function, query all published blogs, and pass them to the front end for traversal display. The view function code is as follows:
# 展示全部博客
@blog.route(/blogAll)
def blogAll():
    # order_by按照时间倒序
    blogList = Blog.query.order_by(Blog.create_time.desc()).all();
    return render_template('blogAll.html', blogList=blogList)
Because the latest blog post is at the last entry in the database, the query is performed in reverse order based on the posting time.
The page code is as follows:
{% extends 'base.html' %}
{% block title %}
在线博客平台.博客
{% endblock %}
{% block css %}
<link rel=stylesheet href=/static/css/blogAll.css>
{% endblock %}
{% block content %}
<div class=main>
<ul>
{% for blog in blogList %}
<li>
<a class=title href=/blog/showBlog/{{ blog.id }}>{{ blog.title }}</a>
<p>
发布人:{{ blog.user.name }} 发布时间:{{ blog.create_time }}
</p>
</li>
{% endfor %}
</ul>
</div>
{% endblock %}
{% block blog_class %}
layui-this
{% endblock %}
The effect is as follows:
Blog details page
Click the title of the blog in the blog list to enter the details page of the blog. The details page displays the detailed content and comment content of the blog.
Because the blog content stored in the database is in Markdown format, it needs to be parsed into HTML format here. The parsing code is as follows.
<script src=/static/editor/lib/marked.min.js></script>
<script src=/static/editor/lib/prettify.min.js></script>
<script src=/static/editor/lib/raphael.min.js></script>
<script src=/static/editor/lib/underscore.min.js></script>
<script src=/static/editor/lib/sequence-diagram.min.js></script>
<script src=/static/editor/lib/flowchart.min.js></script>
<script src=/static/editor/lib/jquery.flowchart.min.js></script>
<script src=/static/editor/editormd.js></script>
editormd.markdownToHTML(test, {
    htmlDecode: style,script,iframe,
    emoji: true,
    taskList: true,
    tex: true,  // 默认不解析
    flowChart: true,  // 默认不解析
    sequenceDiagram: true  // 默认不解析
});
Comment
Comments can be made on the blog details page. The editor of Layui is used for comments, which is relatively simple and can achieve the desired effect.
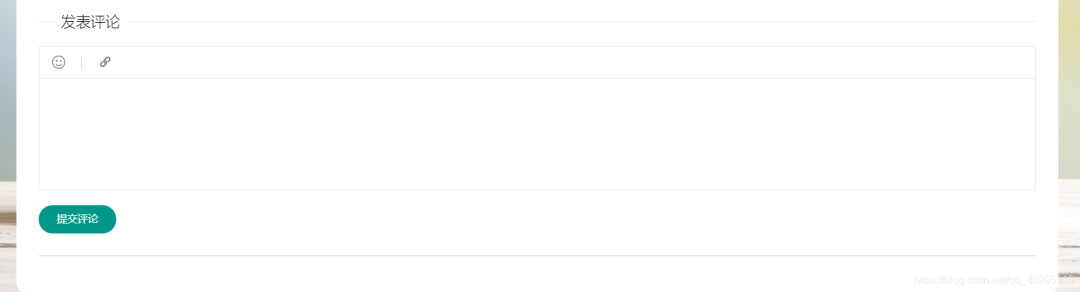
Does it seem to be okay? It also matches the page. Comments need to be logged in before you can comment. If you are not logged in, you will be prompted to log in.
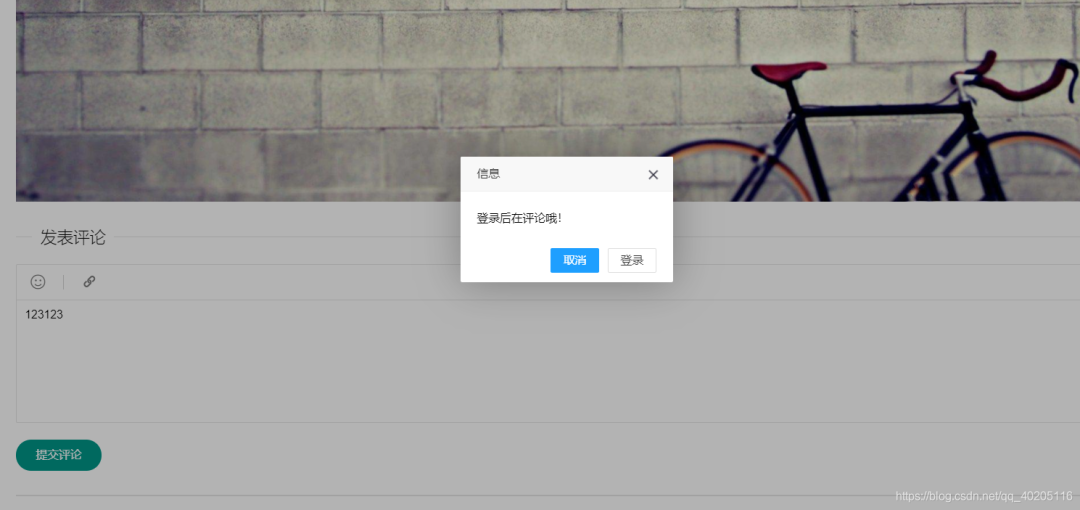
If you log in to comment, a save comment request will be sent, carrying the id of the current blog and the comment content for saving.
View function for saving comments.
# 评论
@blog.route(/comment, methods=['POST'])
@login_limit
def comment():
    text = request.values.get('text')
    blogId = request.values.get('blogId')
    username = session.get('username')
    # 获取当前系统时间
    create_time = time.strftime(%Y-%m-%d %H:%M:%S)
    user = User.query.filter(User.username == username).first()
    comment = Comment(text=text, create_time=create_time, blog_id=blogId, user_id=user.id)
    db.session.add(comment)
    db.session.commit();
    return {
        'success': True,
        'message': '评论成功!',
    }
The above blog content analysis and comments are all in one page, and the complete code is as follows.
{% extends 'base.html' %}
{% block title %}
在线博客平台.博客
{% endblock %}
{% block css %}
<link rel=stylesheet type=text/css href=/static/editor/css/editormd.css/>
<link rel=stylesheet href=/static/css/showBlog.css>
<script src=/static/editor/lib/marked.min.js></script>
<script src=/static/editor/lib/prettify.min.js></script>
<script src=/static/editor/lib/raphael.min.js></script>
<script src=/static/editor/lib/underscore.min.js></script>
<script src=/static/editor/lib/sequence-diagram.min.js></script>
<script src=/static/editor/lib/flowchart.min.js></script>
<script src=/static/editor/lib/jquery.flowchart.min.js></script>
<script src=/static/editor/editormd.js></script>
{% endblock %}
{% block content %}
<div class=main>
<h1>{{ blog.title }}</h1>
<p>发布人:{{ blog.user.name }} 发布时间:{{ blog.create_time }}</p>
<hr>
<div id=test>
<textarea>{{ blog.text }}</textarea>
</div>
<fieldset class=layui-elem-field layui-field-title>
<legend>发表评论</legend>
<input type=hidden id=blog_id name=blogId value={{ blog.id }}>
<textarea id=lay_edit lay-verify=content name=text></textarea>
<button type=button class=layui-btn comSub>提交评论</button>
</fieldset>
<hr style=margin-top: 30px; margin-bottom: 20px;>
<ul class=comment>
{% for com in comment %}
<li>
<p class=myText>{{ com.text }}</p>
<p>评论人:{{ com.user.name }} 发布时间:{{ com.create_time }}</p>
</li>
{% endfor %}
</ul>
</div>
<script type=text/javascript>
$(function (){
$(.myText).each(function () {
$(this).html($(this).text());
});
})
editormd.markdownToHTML(test, {
htmlDecode: style,script,iframe,
emoji: true,
taskList: true,
tex: true, // 默认不解析
flowChart: true, // 默认不解析
sequenceDiagram: true // 默认不解析
});
layui.use(['layedit', 'form'], function () {
var form = layui.form;
var layedit = layui.layedit;
//创建一个编辑器
var index = layedit.build('lay_edit', {
height: 150,
tool: [
'face', //表情
'|', //分割线
'link' //超链接
]
});
$(.comSub).click(function (){
layui.use('layer', function(){
var layer = layui.layer;
{% if username %}
//获取评论内容
var text = layedit.getContent(index);
var blogId = $(#blog_id).val();
if(text == || text == undefined){
layer.msg(评论不能为空哦!, {icon: 0});
}else {
$.post(/blog/comment, {text: text, blogId: blogId}, function (result) {
if (result.success) {
window.location.href = '/blog/showBlog/' + blogId;
}
})
}
{% else %}
layer.confirm('登录后在评论哦!', {
btn: ['取消','登录']
}, function(index){
layer.close(index);
}, function(){
window.location.href = '/login';
});
{% endif %}
});
})
});
</script>
{% endblock %}
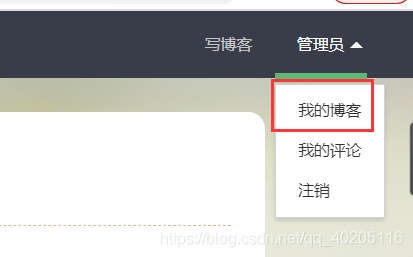
my blog
After logging in, you can view my blog in the navigation bar in the upper right corner, view and manage blogs that have been published by individuals.
Define a view function to query all blogs published by the currently logged in user.
# 查看个人博客
@blog.route(/myBlog)
@login_limit
def myBlog():
username = session.get('username')
user = User.query.filter(User.username == username).first()
# order_by按照时间倒序
blogList = Blog.query.filter(Blog.user_id == user.id).order_by(Blog.create_time.desc()).all()
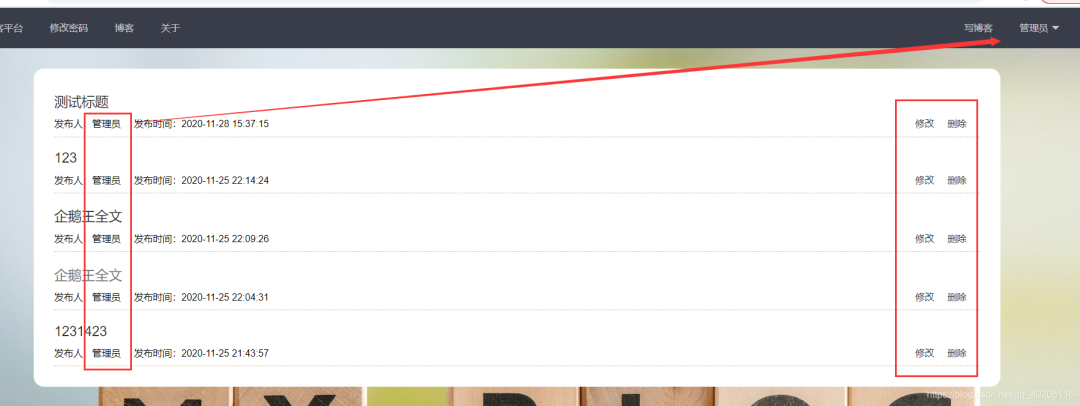
return render_template(myBlog.html, blogList=blogList)
A page is basically similar to a blog list, but its blogs can be modified and deleted.
Edit blog
In my blog, there is a link to modify the blog, pass the current blog id as a parameter to the background, query the data of the current blog, and modify it.
# 博客修改
@blog.route(/update/<id>, methods=['POST', 'GET'])
@login_limit
def update(id):
    if request.method == 'GET':
        blog = Blog.query.filter(Blog.id == id).first();
        return render_template('updateBlog.html', blog=blog)
    if request.method == 'POST':
        id = request.form.get(id)
        title = request.form.get(title)
        text = request.form.get(text)
        blog = Blog.query.filter(Blog.id == id).first();
        blog.title = title;
        blog.text = text;
        db.session.commit();
        return render_template('blogSuccess.html', title=title, id=id)
Modifying the page is basically the same as writing a blog page, setting the default value of the markdown editor in the textarea tag.
<textarea name = text lay-verify=required style=display:none; >{{ blog.text }}</textarea>
delete blog
Deleting a blog is the same as modifying it. Pass the id of the blog to the backend, and delete the corresponding data in the database according to the id.
# 删除博客
@blog.route(/delete/<id>)
@login_limit
def delete(id):
    blog = Blog.query.filter(Blog.id == id).first();
    db.session.delete(blog);
    db.session.commit();
    return {
        'state': True,
        'msg': 删除成功!
    }
After the deletion is successful, use JS to delete the corresponding DOM element on the page.
 function del(url, that){
    layui.use('layer', function(){
        var layer = layui.layer;
        layer.confirm('您确定要删除吗?', {
            btn: ['取消','确定']
        }, function(index){
            layer.close(index);
        }, function(){
            $.get(url, function (data){
                if(data.state){
                    $(that).parent().parent().parent().remove();
                    layer.msg(data.msg, {icon: 1});
                }
            })
        });
    });
}
my comment
In the upper right corner of the page, you can not only view personal published blogs, but also all your own comments.
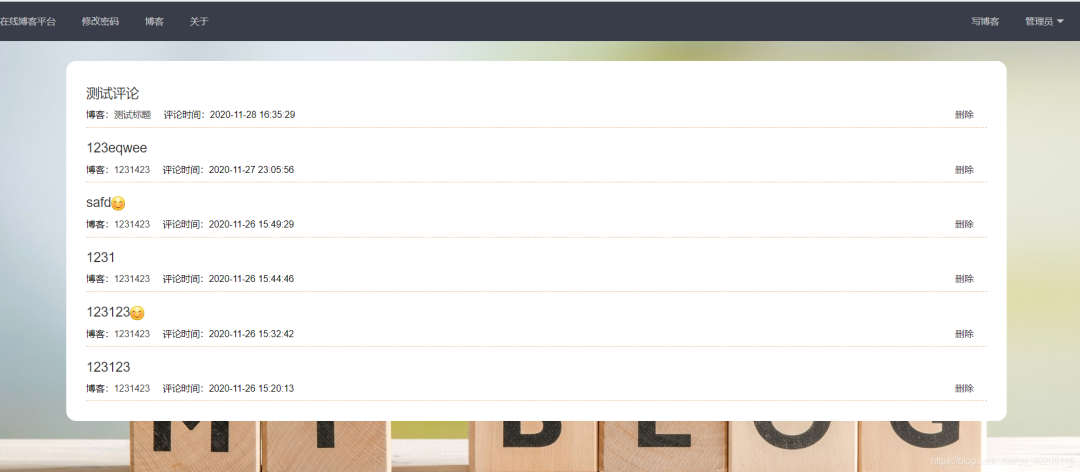
According to the comment list, you can click on the comment or blog to enter the blog details page of the comment; you can also delete the content of the comment.
Define a view function, query all the comment content, and return it to the front desk to traverse the display (also query according to the reverse order of time).
# 用户所有的评论
@blog.route('/myComment')
@login_limit
def myComment():
    username = session.get('username')
    user = User.query.filter(User.username == username).first()
    # order_by按照时间倒序
    commentList = Comment.query.filter(Comment.user_id == user.id).order_by(Comment.create_time.desc()).all();
    return render_template(myComment.html, commentList=commentList)
Front-end page display code.
{% extends 'base.html' %}
{% block title %}
在线博客平台.我的评论
{% endblock %}
{% block css %}
<link rel=stylesheet href=/static/css/blogAll.css>
{% endblock %}
{% block content %}
<div class=main>
<ul>
{% for comment in commentList %}
<li>
<a class=title href=/blog/showBlog/{{ comment.blog_id }}>{{ comment.text }}</a>
<p>
博客:<a href=/blog/showBlog/{{ comment.blog_id }}>{{ comment.blog.title }}</a> 评论时间:{{ comment.create_time }}
<span class=operation>
<a href=javascript:; onclick=del('/blog/deleteCom/{{ comment.id }}', this)>删除</a>
</span>
</p>
</li>
{% endfor %}
</ul>
</div>
<script type=text/javascript>
$(function (){
$(.title).each(function () {
$(this).html($(this).text());
});
})
function del(url, that){
layui.use('layer', function(){
var layer = layui.layer;
layer.confirm('您确定要删除吗?', {
btn: ['取消','确定']
}, function(index){
layer.close(index);
}, function(){
$.get(url, function (data){
if(data.state){
$(that).parent().parent().parent().remove();
layer.msg(data.msg, {icon: 1});
}
})
});
});
}
</script>
{% endblock %}
The page style is the same as the blog list style.
delete comment
在评论列表中有删除评论的链接,根据评论的id删除当前条评论,删除后,对应博客中的评论也随之删除。
# 删除评论
@blog.route('/deleteCom/<id>')
def deleteCom(id):
    com = Comment.query.filter(Comment.id == id).first()
    db.session.delete(com);
    db.session.commit();
    return {
        'state': True,
        'msg': 删除成功!
    }
关于页面
关于页面可以简单的描述一下网站的设计及作用等,这里就没有写过多的内容了,可以自行设计。
注销
注销只需要清除session中的数据,返回首页即可。
# 退出
@index.route('/logout')
def logout():
    session.clear()
    return redirect(url_for('index.hello'))
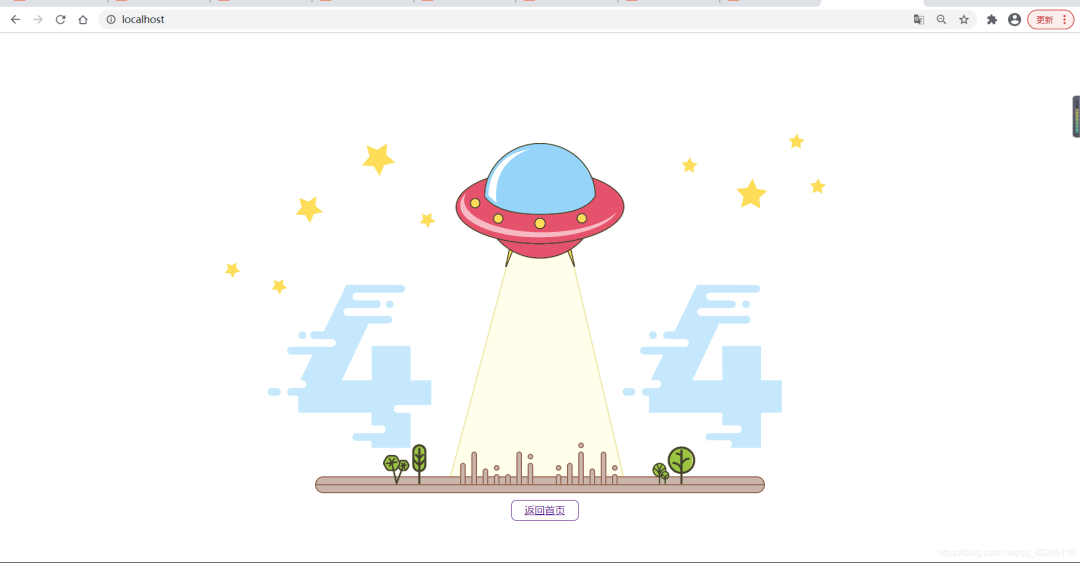
定义错误页面
系统在平时使用中难免会遇到一些错误,但又不能直接让用户看到这些错误,所以我们可以定义一个错误页面,使其报错后都跳转到此页面。Flask中有两个视图函数处理404和500错误的,这里直接使用即可,这里两个视图函数都是跳转到了同一个页面(也可以跳转不同的页面)。
# 404页面
@app.errorhandler(404)
def page_not_found(e):
    return render_template('404.html'), 404;

# 500页面
@app.errorhandler(500)
def internal_server_error(e):
    return render_template('404.html'), 500;
错误页面这里就简单的插入了一张图片,添加了一个返回首页的链接。
<!DOCTYPE html>
<html lang=en>
<head>
    <meta charset=UTF-8>
    <title>网站走丢了。。。</title>
</head>
<style type=text/css>
body{
    position: fixed;
    width: 100%;
    height: 100vh;
    background: url('/static/img/404.gif') no-repeat;
    background-size: cover;
    z-index: -1;
}
a{
    width: 65px;
    display: inherit;
    margin: 0 auto;
    margin-top: 87vh;
    padding: 5px 20px;
    border: 1px solid;
    border-radius: 8px;
}
</style>
<body>
<a href=/>返回首页</a>
</body>
</html>
效果如下:
源码下载
到这里整个博客系统就完成了,最后在附上下载链接:https://github.com/machaoyin/flask_blog/tree/master
版权声明:本文为CSDN博主「编程 小马」的原创文章,遵循CC 4.0 BY-SA版权协议,转载请附上原文出处链接及本声明。原文链接:
https://blog.csdn.net/qq_40205116/article/details/110265729
纯免费在线学编程

扫码开始学


戳原文👇在线学编程~