
❝
When it comes to operation and maintenance, for a long time I thought that it was nothing to do with the front end. It should be said that half a dime has nothing to do with it. However, with the development of front-end engineering, knowledge about basic front-end operation and maintenance deployment is gradually being valued. If your company's operation and maintenance department is very strong, then you can completely ignore the operation and maintenance-related aspects. It's just that Shu Jiang feels that if you want to know more about the front-end architecture, you still need to have a certain knowledge reserve related to operation and maintenance. Of course, cloud manufacturers now want to launch their own serverless services (the next article will talk about ~), claiming to make the front-end more focused on business development, without worrying about the deployment and maintenance of the underlying applications, which can be more focused on developers To the development of the business field, interested children's shoes can go to play
❞
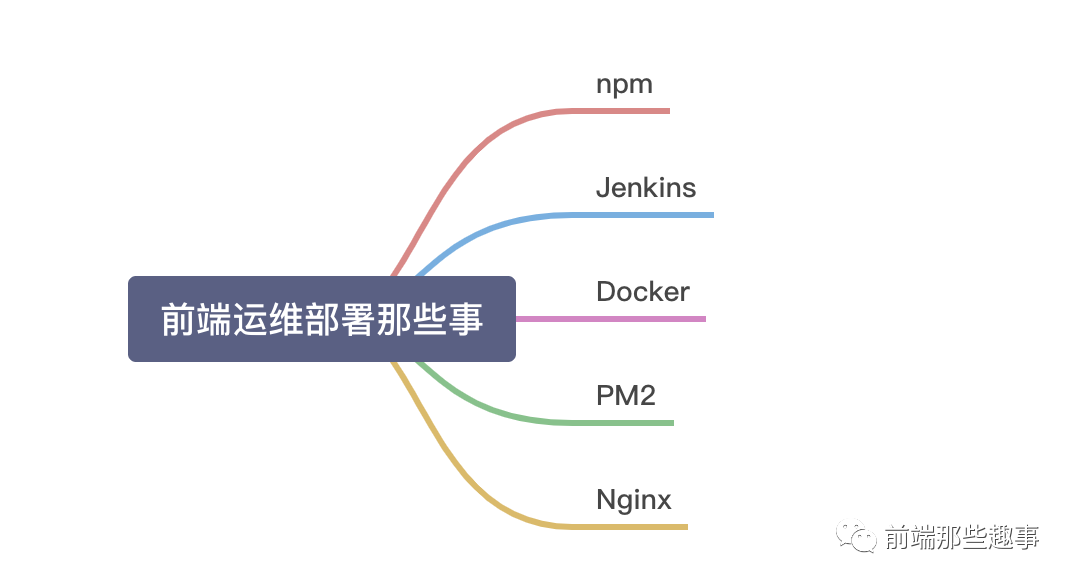
1. npm
❝
npm is an official package management tool provided by Node.js. It is mainly used to manage project dependencies, releases, etc. The following describes several common deployment application scenarios. The commonly used npm commands are not introduced here.
❞
1.1 nrm
❝
nrm (npm registry manager) is an image source management tool of npm, because the links established by npm by default access foreign resources, and the access speed is slow. Using this, you can quickly switch between npm sources.
❞
-
how to install
npm install -g nrm
-
View optional resources
nrm ls

*npm ---- https://registry.npmjs.org/

cnpm --- http://r.cnpmjs.org/

taobao - http://registry.npm.taobao.org/

eu ----- http://registry.npmjs.eu/
...
-
Add private repository link
nrm add name http://registry.npm.tree.com/  # 私有仓库链接
nrm use name # 使用本址的镜像地址
nrm is more used if the company's intranet deploys a private repository, which is convenient for using nrm for source switching, and is also beneficial for version management of dependencies. If you want to build your own private repository, you can use verdaccio, you can see this specific tutorial. click me👇
1.2 Publish npm package
❝
What kind of process do we need to complete when we want to publish an npm package?
❞
-
Register an npm account first 🔗 -
configure package.json
{
  "name": "kutil",
  "version": "1.0.0", #版本名称
  "scripts":[], # 可执行的脚本命令
  "repository": "https://github.com/xxx/xxx.git", #github仓库地址
  "author": "tree <[email protected]>", #作者
  "description": "工具包“, #包的说明
  "keywords": [
    "utils",
  ]
}
-
Configure the packaging mechanism
❝
If it is tool packaging, rollup is recommended, webpack is more suitable for packaging some applications, such as SPA or isomorphic projects
❞
-
Add unit tests
❝
High-quality open source packages have unit test modules to ensure the stability of the package and code quality. There is often a build-passing mark. Interested children's shoes can read the front-end unit tests written before the tree jam.
❞
-
Development documentation readme.me
❝
The readme is convenient for developers to quickly get familiar with it, including specific Api introduction, usage examples, project introduction, etc., and can also include unit test coverage, downloads, certificates, etc.
❞
After completing the above series of operations, the final release link
npm login # 登录你上面注册的npm账号

npm publish # 登录成功后,执行发布命令

+ [email protected] # 发布成功显示npm报名及包的版本号
2. Jenkins
❝
As an extensible automation server, jenkins can be used as a simple CI server with functions such as automated construction, testing and deployment. In short, jenkins can facilitate our daily front-end project version update iterations (development, testing, production environments) etc.), you can also automate a series of operations through it, including: compiling, packaging, meta-testing, code scanning, etc., official documentation
❞
2.1 How to install
-
Download Jenkins.
-
Open a terminal and go to the download directory.
-
run command
java -jar jenkins.war --httpPort=8080. -
Open a browser and go to the link http://localhost:8080.
-
Follow the instructions to complete the installation.
For a detailed flow chart, please refer to Jenkins+github front-end automated deployment
2.2 Automatic deployment with front-end projects
❝
This article mainly introduces the use of the jenkins pipeline configuration. The pipeline code defines the entire build process. It usually includes the stages of building, testing and delivering the application. The following is the configuration of the path and warehouse
❞
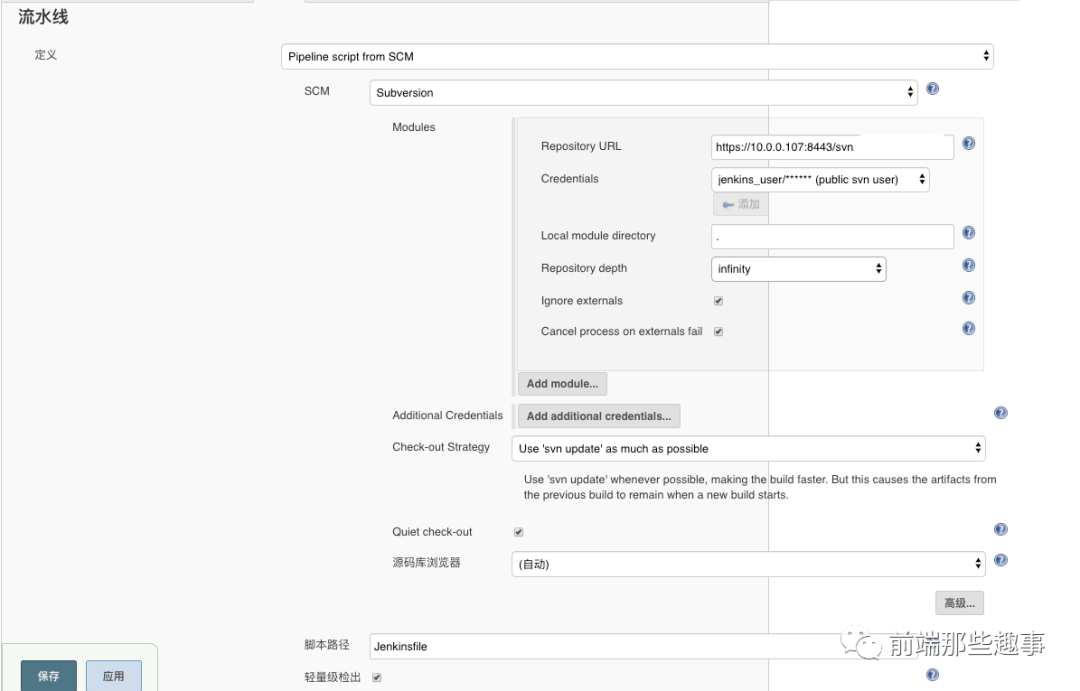
The picture related configuration is as follows:
-
SCM: choose git or svn as code trigger -
Script path: create a jenkinsfile in the project root directory to write the pipeline
The following introduces a simple version of the jenkinsfile pipeline task writing method to complete the compilation and packaging, static scanning, unit testing and other links involved in the entire front-end engineering deployment.
def gitUrl = "http://gitlab.****.com/shc/****.git"//GIT入口(随不同工程改变)
def gitCred = "***-***-4f00-a926-1848b670d97b"    //GIT 身份凭据
if ("DEV" == buildType) {
    buildScript = "build_development"
    try {
        node('k8s') {
            stage('下拉源码') {
                   checkout([$class: 'GitSCM', branches: [[name: '*/master']], doGenerateSubmoduleConfigurations: false, extensions: [], submoduleCfg: [], userRemoteConfigs: [[credentialsId: "${gitCred}", url: "${gitUrl}"]]])
                 #可由片段生成器生成,选择示例步骤 “checkout:Check out from version control”,生成流水线脚本获取
            }
            checkStatus('下拉源码')
            stage('代码构建编译') {
                sh "yarn run ${buildScript}"
            }
            checkStatus('代码构建编译')
            stage('代码静态扫描') {
                sh 'yarn run lint'
            }
            checkStatus('代码静态扫描')
            stage('单元测试') {
                 sh 'yarn run unit'
            }
            checkStatus('单元测试')
        }
    } catch(Exception e) {

    }
}
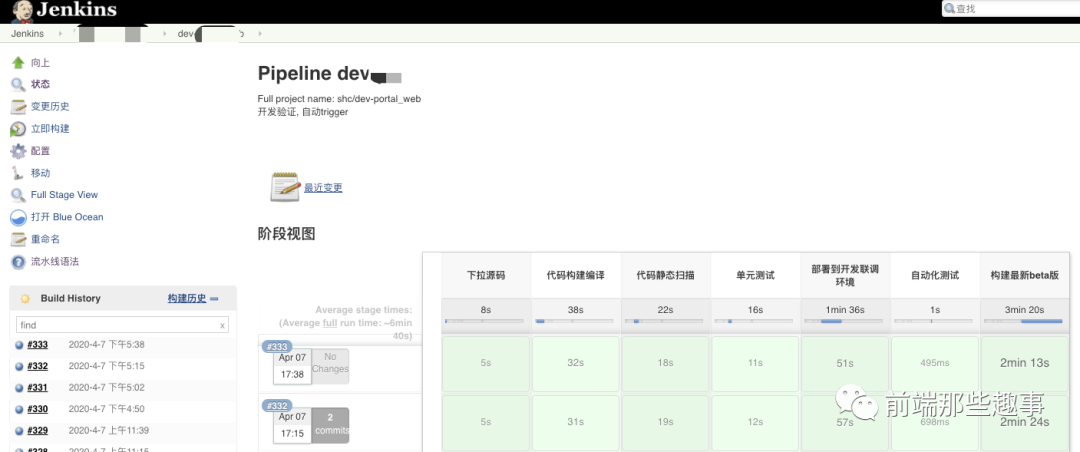
After completion, you can build the project and complete it in stages. The first step is to pull down the source code, build and compile the code, scan the code, etc. The automatic deployment is successful only when all links are successful, as shown below.
3. Docker
❝
Docker is a virtual environment container, which can package the development environment, code, configuration files, etc. into this container, and finally publish the application
❞
3.1 How to use
❝
Complete the traditional deployment process by centralizing deployment operations into a deployment script, and run front-end applications by running docker containers on the server
❞
how to install
yum install docker-ce
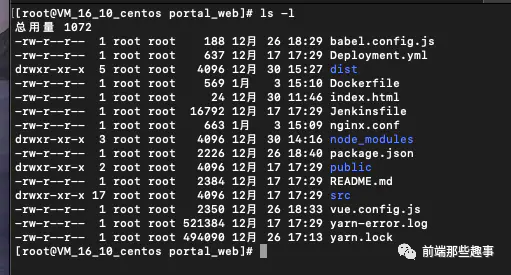
Project directory, the deployment project needs to prepare Dockerfile and nginx.conf (if nginx is not customized, you can use the official image directly)
3.2 Dockerfile configuration
❝
Dockerfile is a configuration file used to make the docker build command clear to run those operations, create a dockerfile and write related configurations
❞
FROM node:latest as builder
WORKDIR /app
COPY package.json
RUN npm install
COPY . .
RUN npm run build


FROM nginx:latest
COPY nginx.conf /etc/nginx
COPY --from=builder /app/dist  /usr/share/nginx/html

//ps: 每一个指令的前缀都必须是大写的。
-
ADD and COPY: Copy a file or directory into the image built by the Dockerfile -
EXPOSE: Specifies the port used by the container running the image, which can be multiple. -
RUN : the instruction tells docker to execute the command inside the image -
FROM : The image name specified by FROM, this image is called the base image and must be in the first non-comment instruction -
WORKDIR: Set the working directory inside the container
Nginx.conf is configured as follows
events {
    worker_connections  1024;
}
http{
    server {
        listen       80;
        server_name  localhost;
        location / {
            root   /usr/share/nginx/html;
            index  index.html index.htm;
        }
    }
}
After creating the file and writing it, use docker to create the image
3.3 How to create an image
❝
Create an image using the Dockerfile of the current directory, labelled frontend
❞
docker build -t frontend .
-
-t : Specifies the target image to create -
. : The directory where the Dockerfile file is located, you can specify the absolute path of the Dockerfile
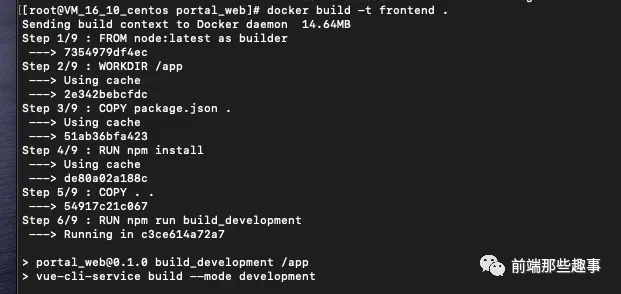
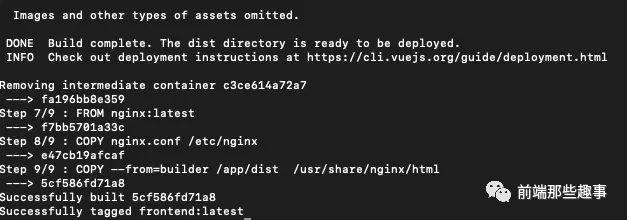
Image successfully generated
3.4 View image
docker image ls | grep frontend

If the result appears, the application image frontend is successfully created, and then we start a Docker container based on the image
4.5 How to start
❝
Use the docker image frontend:latest to start the container in the specified port 80 mapping mode, and name the container frontend
❞
docker run --name frontend -p 80:80 frontend:latest
-
-p: Specify port mapping, the format is: host (host) port: container port Map the host's port 80 to the container's port 80 -
-name: specify a name for the container;
Complete the docker deployment
Docker can also be integrated into the jenkins automated deployment pipeline described in the previous section
  stage('部署到开发联调环境') {
                echo "auto deploy to test environment"
                sh "docker build -t frontend ."
                sh "docker run --name frontend -p 80:80 frontend:latest"
  }
4. PM2
❝
PM2 is a node process management tool, which can be used to simplify many tedious tasks in node application management. It is an indispensable choice for Nodejs application daemon process, which is convenient for managing web services that can be accessed independently under the nodejs platform, such as nextjs, Front-end applications such as express and koa
❞
4.1 Common application scenarios
-
Deploy node koa2 or express project application -
Deploy front-end SSR (back-end rendering) applications, such as nuxt.js (Vue) and next.js (React) to build server-side rendering application frameworks
4.2 How to use
-
Install: npm install -g pm2 -
Start the node project: pm2 start app.js 或者 pm2 start bin/www -
Stop the pm2 service: pm2 stop bin/www -
Stop all pm2 services: stop all -
Restart the pm2 service: pm2 restart bin/www -
pm2 all process information: pm2 list
After startup it looks like this
4.3 Advanced Applications
❝
Add a processes.json in the project root directory
❞
{
 #apps是一个数组,每一个数组成员就是对应一个pm2中运行的应用
  "apps": [{
    "name": "app",  #名称
    "script": "./", #程序入口
    "cwd": "./",           #应用程序所在的目录
    "error_file": "./logs/err.log",#错误输出日志
    "log_date_format": "YYYY-MM-DD HH:mm Z" #日期格式
  }]
}
Combined with the packjson script command, processes can be used to manage multiple applications
"script":{
    "pm2":"pm2 start processes.json"
}
See the pm2 documentation for more commands and configuration information
5. Nginx
❝
Nginx can be used as both a web server and a load balancing server, with high performance, high concurrent connections, etc.
❞
5.1 Those things about front-end Nginx
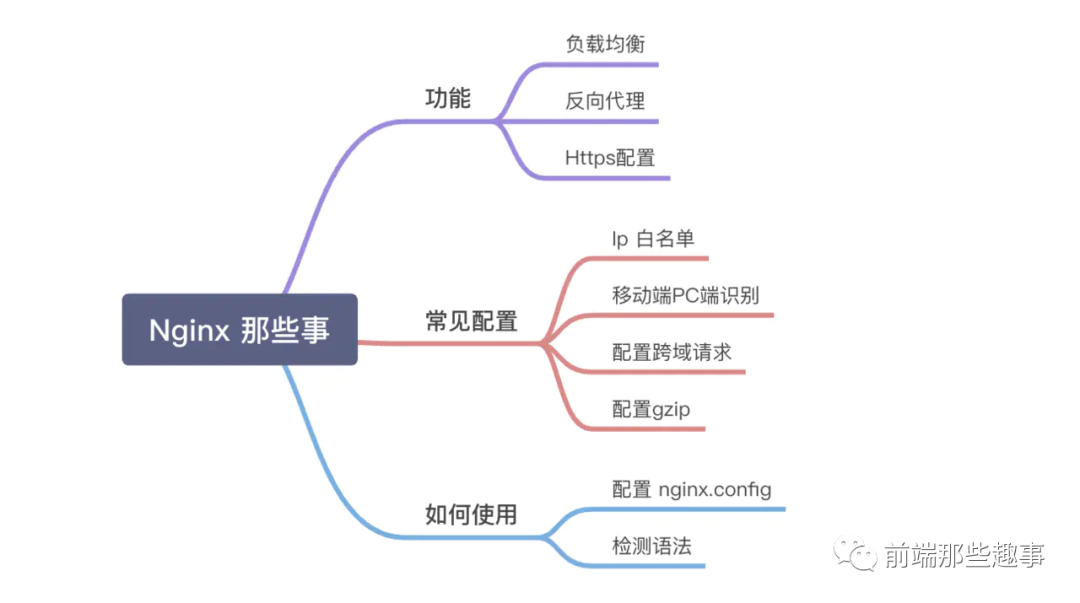
For details, please see the front-end Nginx things that were combed before
5.2 Supplement
-
grayscale release
❝
Grayscale release is to let some people continue to use the old version of product A, and then some users start to use the new version of product B, if users have no feedback on B, then gradually expand the scope. On the one hand, it can ensure the stability of the overall system, and at the initial grayscale, problems can be found and adjusted to ensure their influence.
❞
The traditional grayscale is to distribute traffic to the server through Nginx. Here is a simple grayscale rule configuration. It is good to configure routing rules in nginx. If the rules are complex, you can combine nginx+lua to do some grayscale business. logic
1. Realize grayscale publishing according to Cookie
❝
Differentiate by getting the version number set by the cookie
❞
upstream test1 {
    server 192.168.0.1:8080 max_fails=1 fail_timeout=60;
}

upstream default {
    server 192.168.0.0:8080 max_fails=1 fail_timeout=60;
}

server {
  listen 80;
  server_name  www.****.com;
  set $group "default";
    if ($http_cookie ~* "version=V1"){
        set $group test1;
    }

  location / {
    proxy_pass http://$group;
    proxy_set_header   Host             $host;
    proxy_set_header   X-Real-IP        $remote_addr;
    proxy_set_header   X-Forwarded-For $proxy_add_x_forwarded_for;
    index  index.html index.htm;
  }
 }
-
Realize grayscale publishing according to IP
❝
Distinguish by internal and external network IP
❞
upstream test1 {
    server 192.168.0.1:8080 max_fails=1 fail_timeout=60;
}

upstream default {
    server 192.168.0.0:8080 max_fails=1 fail_timeout=60;
}

server {
  listen 80;
  server_name  www.xxx.com;
  set $group default;
  if ($remote_addr ~ "10.0.0.110") {
      set $group test1;
  }

location / {
    proxy_pass http://$group;
    proxy_set_header   Host             $host;
    proxy_set_header   X-Real-IP        $remote_addr;
    proxy_set_header   X-Forwarded-For $proxy_add_x_forwarded_for;
    index  index.html index.htm;
  }
}
Think this article was helpful to you? Click to see and then go!
It is recommended to pay attention to [front-end fast running] to improve front-end skills Reply to [Guangzhou] Join the Guangzhou front-end market exchange group Reply to [Good Book] Get all kinds of books on the front end Reply [Add group] to join the front-end exchange group
Because the WeChat official account has revised the rules, if you do not star or click to read, you may not receive the push of my official account article. Please star this official account, and remember to like or watch after reading the article . Thank you!
