
foreword


operator precedence
After we learn operators, we still have to mention that there is precedence between these operators.
How to understand it? Like addition, subtraction, multiplication and division we learned in elementary school, multiplication and division take precedence over addition and subtraction.
The following URL lists the precedence between operators, so I won't paste it because of space limitations. Interested students can take a look.
http://t.zoukankan.com/leomei91-p-7614332.html
Also, speaking of precedence, how do you enforce operator precedence for lower precedence?
As in elementary school math, add "()".
for example:
1 + 2 * 37+ 2) * 39
With parentheses and without parentheses, the difference is huge.
This part of the content is relatively simple, basically everyone can understand it, so I won't go into details.
IDE
code block
To be reasonable, the concept of code blocks should not be brought up so early, but for the next content, we must first let everyone understand.
Let's look at a piece of code first. Of course, we may not know what it means at this stage, but this is not important.
def add(a, b):print(a + b)return a + b
Code analysis:
1. As for the meaning of the above content, we do not need to understand. Let's first take a look at what this code has to pay attention to.
2. We found that the line at the beginning of def is written in the top frame. The rest are all indented . That's right, the entire three lines of code is a block of code.
3. In the above code block, the indentation is not really indentation, but 4 spaces . The reason why this point is brought up separately is because if you choose the sublime editor to write code, the indentation of the tab key of the keyboard may report an error when running the code, and you have to force it to replace it with 4 spaces. Other editors don't have this problem for now.
4. In python code, the end of a line of code does not need to be written ";" like other languages . Such as: JS code
5. In python code, a code block does not need to be wrapped with "{ }" .
What does that mean? Let's use other languages to see what the above code looks like, and we'll know by comparison.
# JavaScript代码演示function add(a, b){return a + b;}
Of course, this is just a brief introduction, and there are some coding standards that we will mention later. For the time being, everyone understands so much first, to pave the way for the following content.
VsCode
We first use vscode as the editor by default to introduce, other editors are actually similar. Here is the main idea.
Before, our code was all run in cmd. The following code needs to write many lines and code blocks at a time. cmd obviously cannot meet our needs. So, how to use IDE to write code?
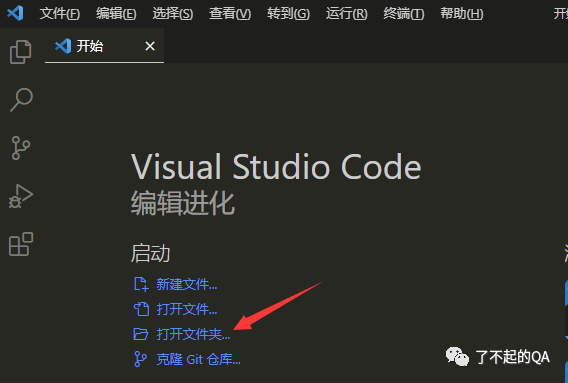
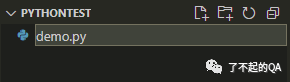
1. Create a new py file.
First of all, we will create a new folder on the disk for later practice. Where is it, you can choose it as you like.

Here, the author built a "PythonTest" folder on the D drive to store our learning code.
Then, open vscode and select this folder.
In this way, we enter this screen
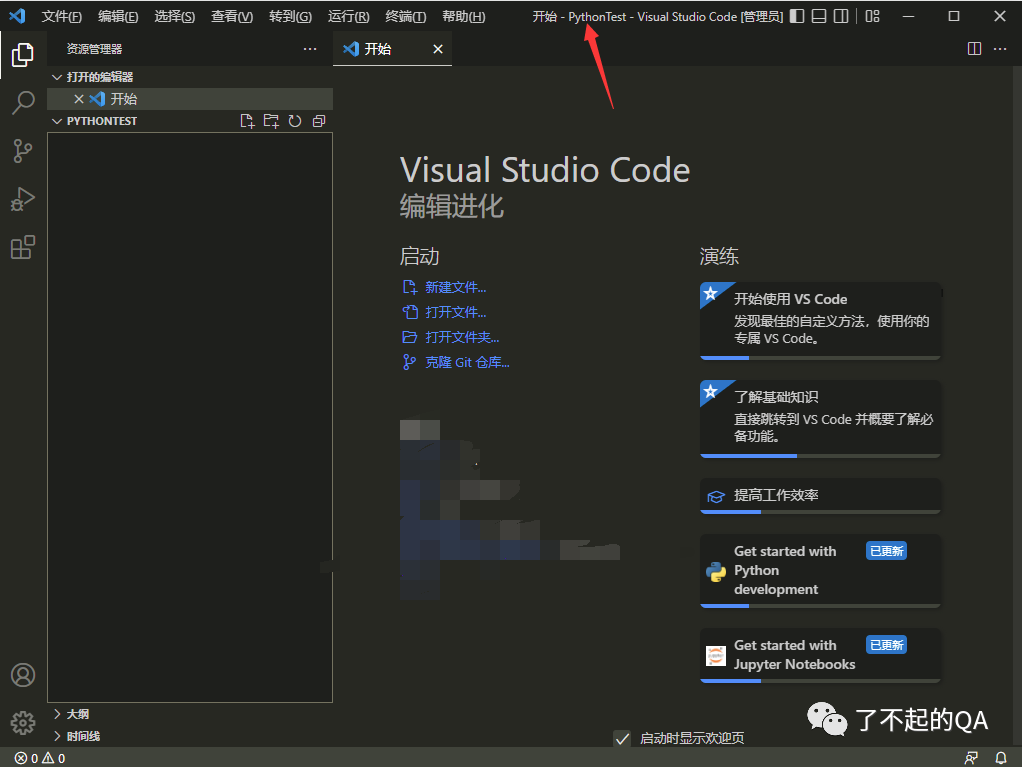
The location of the arrow is the name of the folder we opened.
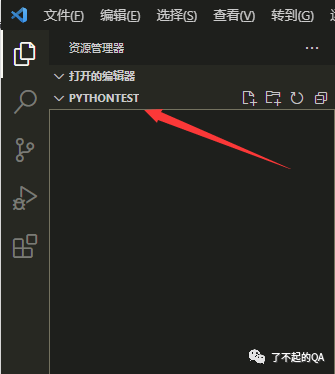
Also see this arrow for confirmation.
Next, we click " Right-click " - " New File" in the area under this arrow .
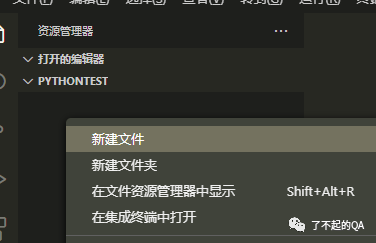
Type "demo.py" and hit " Enter" on the keyboard.
In this way, a python file is built.
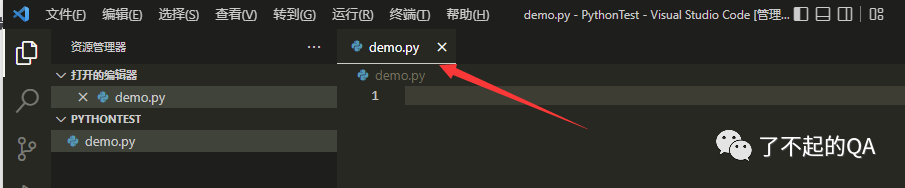
At this point, a tab called "demo.py" opens on the right.
2. Run the code
Let's just write some python code.
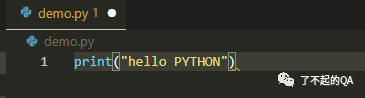
Note: This is still an unsaved state because there is a white dot behind the tab.
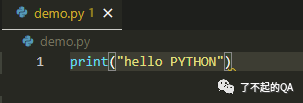
After writing, we press the keyboard "Ctrl + S" key combination to save the file.
In this way, the white dots disappear, which means the save is successful.
OK, let's run this line of code.
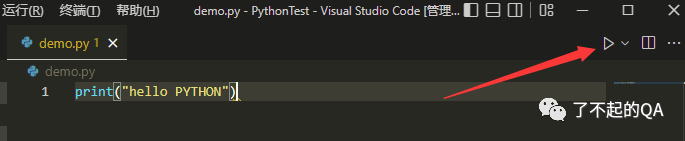
Arrow here, this triangle, click to run.
In addition, in this tab, right-click and select the red box under both.
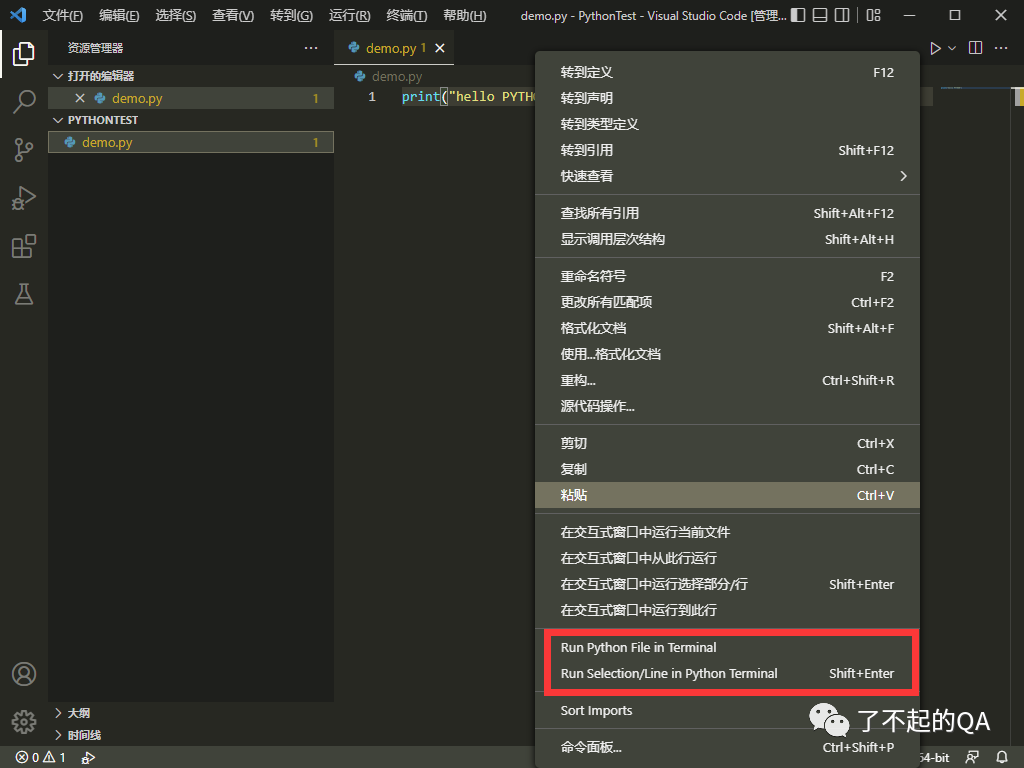
Of course, there may be many plug-ins installed by the author, and it is also possible that the right-click menu may be different. Overall, there are many ways to run code. There is really a big difference, and it can be " programmed for Baidu ".
Let's look at the running results:
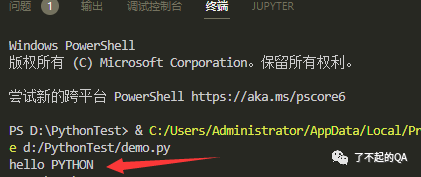
As you can see, the results of our operation are displayed.
Note: If you choose VsCode like me. Then you must first configure it as a python development environment. Otherwise, pure VsCode is just a text tool.
Put another link. At the end of the article, the content of environment construction is mentioned.
Summarize
Well, today's content summarizes the previous article, and also lays the groundwork for the next article. Everyone can practice, and we will learn a lot of basic knowledge in the next content. But it's not as boring as before. After all, the follow-up content is actually writing code.
So, see you in the next part ヾ(•ω•`)o

END

Click to see your best